The Horse in Motion and FFmpeg Gotchas - Part 2 Serverless on AWS Lambda
python
aws
A hands-on guide to deploying a Python-based FFmpeg workflow on AWS Lambda using SAM, covering layer creation, binary selection, and executing subprocesses in a serverless environment.
Published
July 30, 2025
Introduction
In Part 1 of this series, we successfully used FFmpeg to create the classic “Horse in Motion” video from a sequence of still images. We did it all within the comfortable and feature-rich environment of a Google Colab notebook. But personal notebooks are for development and experimentation. To build a real-world application, we need to run our code in a scalable, automated environment.
Welcome to Part 2, where we take our show on the road—to the cloud! Our goal is to run the exact same process inside an AWS Lambda function.
This move introduces a whole new set of “gotchas.” We can’t just apt-get install ffmpeg. Lambda functions run in a tightly controlled environment. We need to package our own FFmpeg binary, deal with file system limitations, and ensure our chosen build has the features we need.
In this post, we’ll walk through:
Setting up a basic serverless application with the AWS SAM CLI.
The challenge of finding the right static FFmpeg build.
Creating an AWS Lambda Layer to make FFmpeg available to our function.
Modifying our code to execute FFmpeg, download images, and save the final video to an S3 bucket.
Let’s dive in and see what it takes to get our horse running in the serverless world.
The Scaffolding: A Basic SAM Application
Before we even think about FFmpeg, let’s build the basic structure of our serverless application. We’ll use the AWS Serverless Application Model (SAM), a framework that makes defining and deploying serverless applications much easier. Think of it as a blueprint for our Lambda function and its related resources, like S3 buckets and permissions.
Our first step is to create a simple Lambda function that can write a file to an S3 bucket. This proves that our basic plumbing (permissions, environment variables, S3 access) is working correctly.
Here’s our initial template.yaml file:
Show the code
AWSTemplateFormatVersion: "2010-09-09"Transform: AWS::Serverless-2016-10-31Description: > ffmpeg-lambda-demo A simple Lambda function to process video with FFmpeg.Globals: Function: Timeout: 60# Set a longer timeout for video processing MemorySize: 512# Provide enough memoryResources:# The S3 bucket where our output videos will be stored OutputBucket: Type: AWS::S3::Bucket# The Lambda function that will run our code FFmpegFunction: Type: AWS::Serverless::Function Properties: CodeUri: src/ Handler: app.lambda_handler Runtime: python3.13 Architectures:- x86_64# Pass the bucket name to the function as an environment variable Environment: Variables: OUTPUT_BUCKET: !Ref OutputBucket# Give the function permission to write to the S3 bucket Policies:- S3WritePolicy: BucketName: !Ref OutputBucketOutputs: OutputBucketName: Description: "Name of the S3 bucket for output videos" Value: !Ref OutputBucket
And here is the corresponding Python code in src/app.py. For now, it just creates a simple text file and uploads it to S3.
Show the code
# src/app.pyimport osimport boto3# Get the S3 bucket name from the environment variablesOUTPUT_BUCKET = os.environ.get("OUTPUT_BUCKET")s3_client = boto3.client("s3")def lambda_handler(event, context):""" A simple handler to test writing a file to S3. """try: file_content ="Hello from Lambda! The connection to S3 is working." file_path ="/tmp/test.txt"# Lambda functions can only write to the /tmp directorywithopen(file_path, "w") as f: f.write(file_content)# Upload the file to our S3 bucket s3_client.upload_file(file_path, OUTPUT_BUCKET, "test-output.txt")return {"statusCode": 200,"body": "Successfully created and uploaded test.txt to S3.", }exceptExceptionas e:print(e)raise e
Finally, our src/requirements.txt only needs boto3, which is the AWS SDK for Python.
boto3
To deploy this, you can run the standard SAM commands from your terminal:
# Build the applicationsam build# Deploy it to your AWS account with a guided processsam deploy --guided
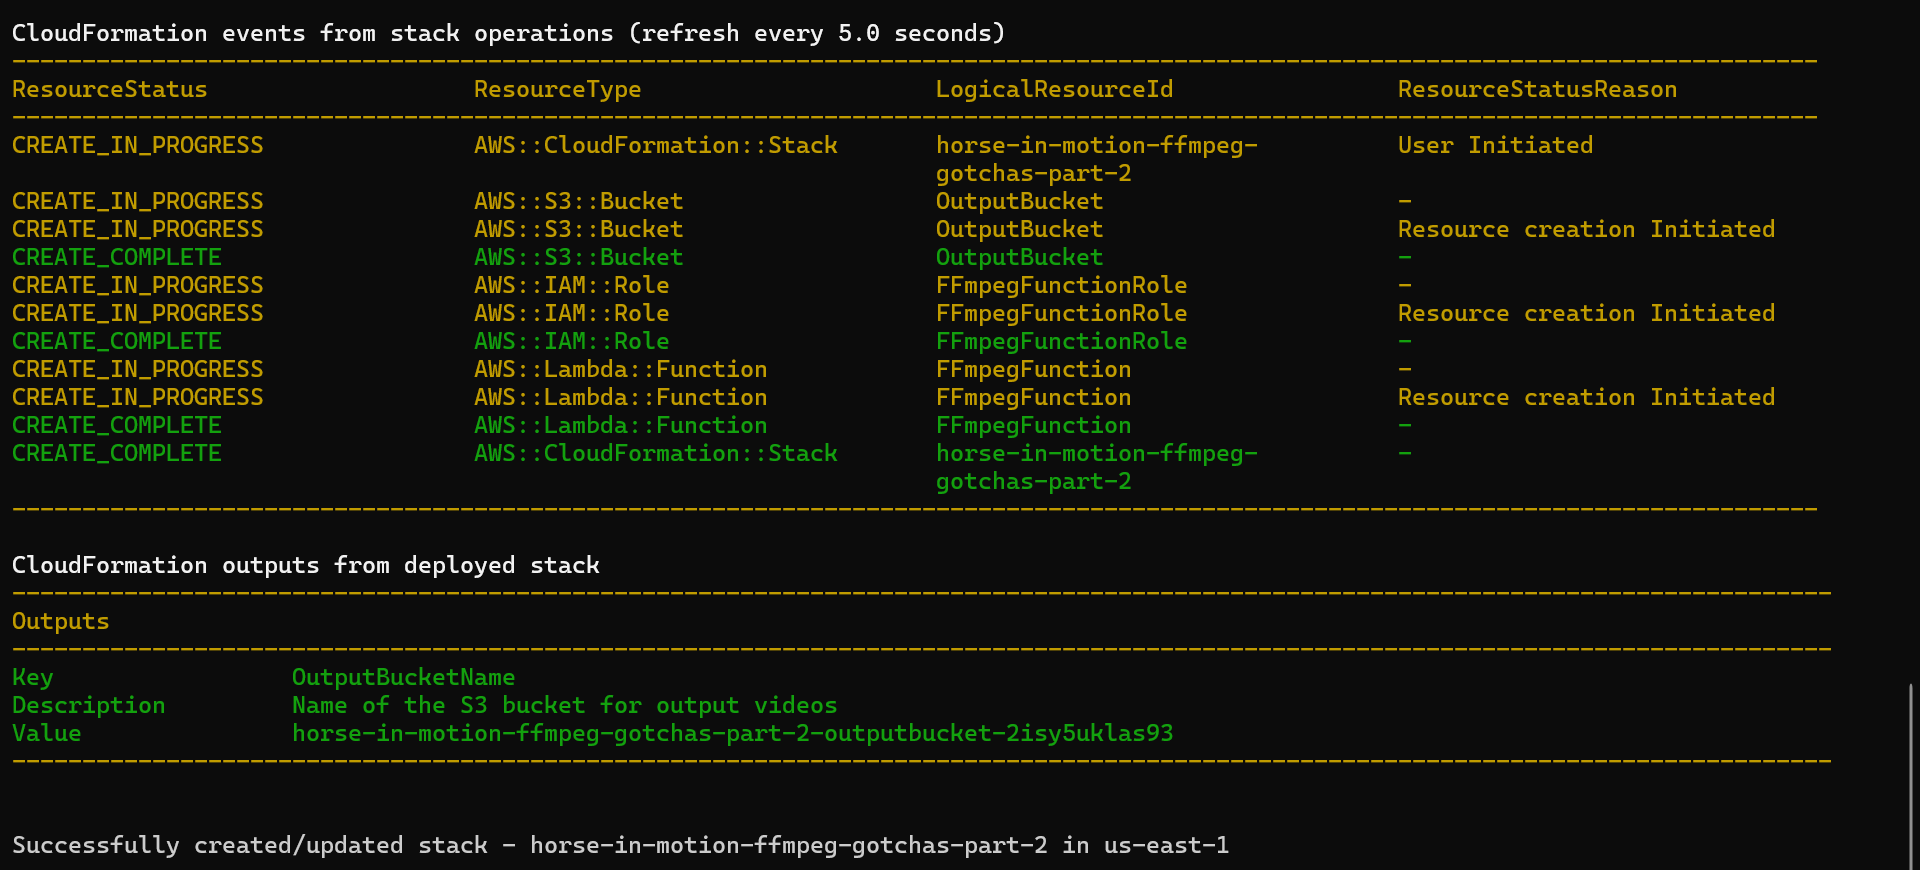
SAM deploy
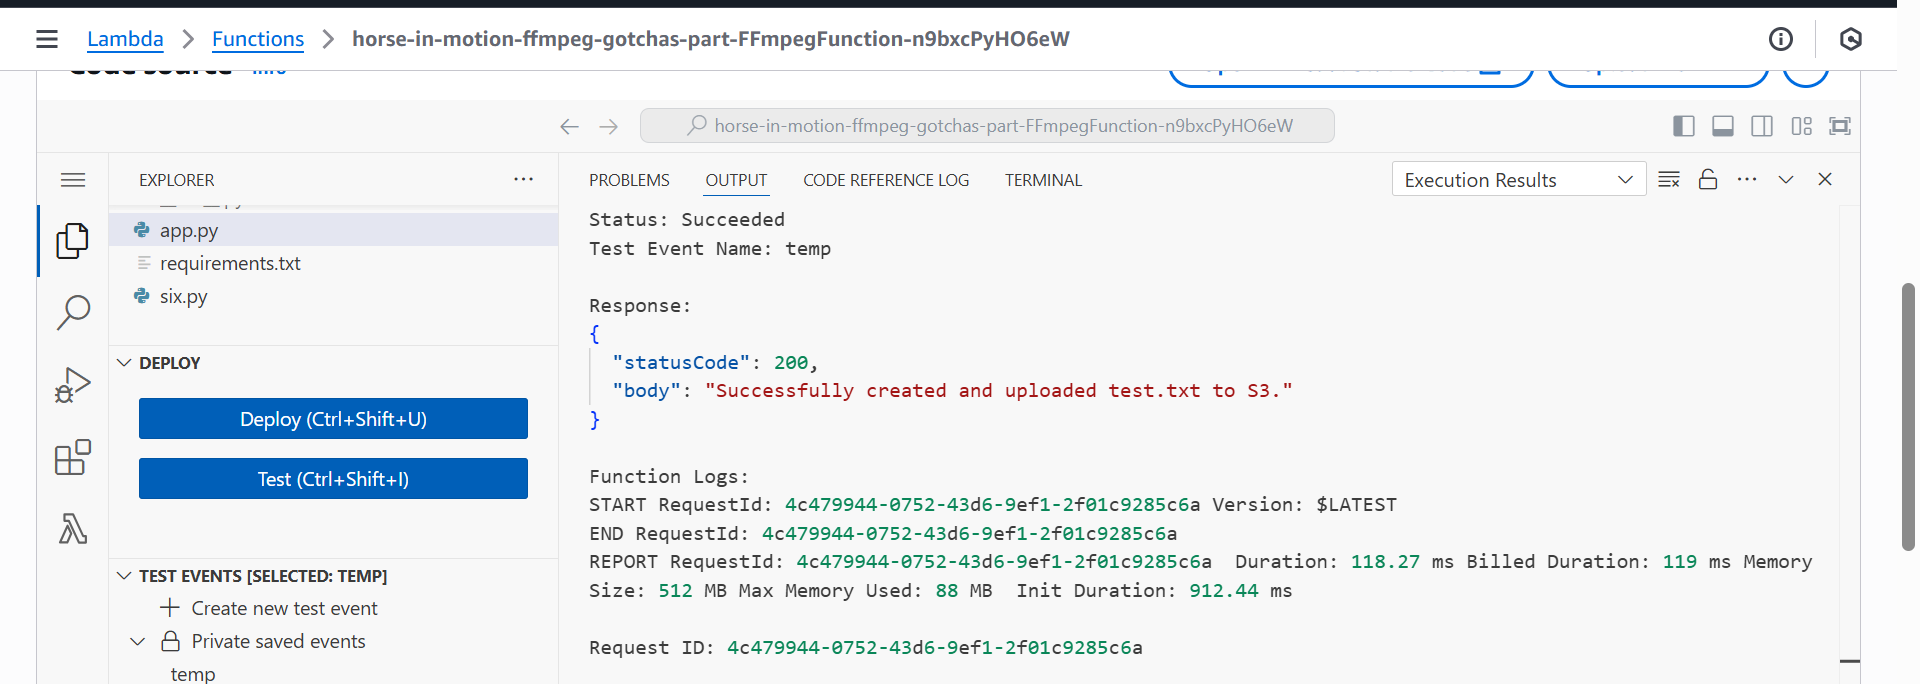
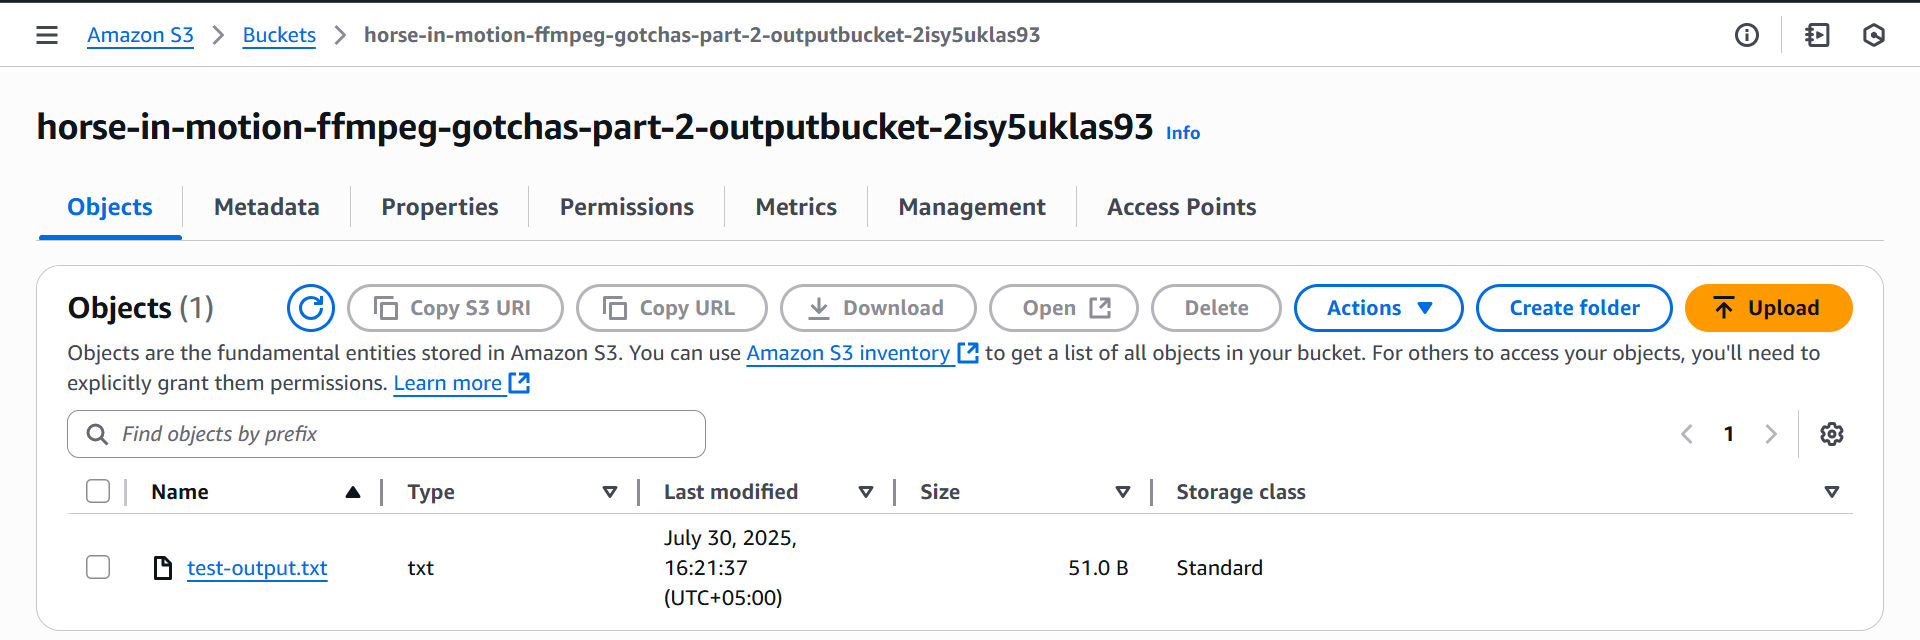
After deployment, you can test the function from the AWS Console. If it runs successfully, you’ll find a test-output.txt file in the newly created S3 bucket.
Test Lambda function
S3 bucket output file
Now that our basic infrastructure is in place, it’s time to tackle the main challenge: getting FFmpeg to run.
In a standard Linux environment, installing FFmpeg is as simple as sudo apt-get install ffmpeg. In AWS Lambda, we don’t have that luxury. We need a static binary — a single, self-contained executable file that we can package with our code. This binary needs to have all its dependencies compiled into it, so it can run anywhere without needing external libraries.
Attempt #1: The John Van Sickle Build
A very popular and reliable source for static FFmpeg builds is John Van Sickle’s website. These builds are fantastic and widely used. Let’s download one and see if it fits our needs.
We’ll grab the amd64 build, as our Lambda function is configured for the x86_64 architecture.
# Download and extract the build!wget https://johnvansickle.com/ffmpeg/releases/ffmpeg-release-amd64-static.tar.xz
--2025-07-30 12:18:11--  https://johnvansickle.com/ffmpeg/releases/ffmpeg-release-amd64-static.tar.xz
Resolving johnvansickle.com (johnvansickle.com)... 107.180.57.212
Connecting to johnvansickle.com (johnvansickle.com)|107.180.57.212|:443... connected.
HTTP request sent, awaiting response... 200 OK
Length: 41888096 (40M) [application/x-xz]
Saving to: ‘ffmpeg-release-amd64-static.tar.xz’

ffmpeg-release-amd6 100%[===================>]  39.95M  11.9MB/s    in 3.4s

2025-07-30 12:18:15 (11.9 MB/s) - ‘ffmpeg-release-amd64-static.tar.xz’ saved [41888096/41888096]
!tar -xf ffmpeg-release-amd64-static.tar.xz
Now, let’s inspect this build, just like we did in Part 1. We need two things:
An H.264 encoder (like libx264).
The drawtext filter for adding our title.
First, let’s check for libx264 by listing the available codecs.
Great news! We see (encoders: libx264 ...), so our preferred encoder is available.
Now for the critical test: does this build support the drawtext filter? As we learned, this filter depends on the libfreetype library being enabled during compilation (check the ffmpeg drawtext docs). Let’s check the build configuration.
If you scan through the long list of flags in the output, you’ll see something encouraging:
--enable-libfribidi
--enable-libfreetype
It looks like we’re in luck! --enable-libfreetype is present, which is the primary dependency for the drawtext filter. So, our filter should be available, right?
Let’s confirm by explicitly searching for drawtext in the list of available filters.
This is puzzling. The output is empty. Even though the libfreetype dependency is enabled, the drawtext filter itself is not included in this build. This is a perfect example of a deep FFmpeg gotcha: a build can have the libraries needed for a feature, but the feature itself might still be disabled through other configuration flags during the compile process (like --disable-filters=drawtext). The reasons can vary, from reducing binary size to avoiding potential licensing conflicts.
So, despite getting our hopes up, this build won’t work for us. The key takeaway remains the same: you must verify that the specific codec and filter you need are present in your chosen build.
It’s time to continue our search for a different static build that has both an H.264 encoder and the drawtext filter enabled.
Attempt #2: A Build That Strikes the Right Balance
Our search for the perfect FFmpeg binary leads us to another highly-regarded source: the automated builds from GitHub user BtbN, which are linked from the official FFmpeg download page. These builds come in various flavors, so we have a better chance of finding one that fits our specific needs.
We’ll try the ffmpeg-n7.1-latest-linux64-lgpl-7.1.tar.xz version.
And just when we thought we were in the clear, another gotcha appears. This build has drawtext, but it does not include libx264. This is often due to licensing. libx264 is licensed under GPL, and distributing a build with it can have certain legal implications.
So, are we stuck? Not at all. This is where knowing about alternatives pays off. If we search for H.264 encoders in this build, we find another option:
This build includes libopenh264, an open-source H.264 encoder provided by Cisco. While libx264 is often considered the highest-quality software encoder, libopenh264 is more than capable for most use cases, including ours. Its more permissive license (BSD) makes it a popular choice for distributable builds.
We have a winner! This build strikes the perfect balance for our needs:
It’s a static binary, perfect for AWS Lambda.
It includes the essential drawtext filter.
It provides a solid H.264 encoder, libopenh264.
Now that we’ve found our champion binary, it’s time to package it up as a Lambda Layer and put it to work.
Putting It All Together: Building the Layer and Deploying the Function
We’ve found our FFmpeg binary. Now it’s time to integrate it into our serverless application. This involves two main steps: packaging the binary into a Lambda Layer and updating our Python code to use it.
Step 1: Create the FFmpeg Lambda Layer
A Lambda Layer is a .zip file archive that can contain additional code or data. By packaging FFmpeg as a layer, we can keep it separate from our function code. This makes our deployment package smaller and our project more organized.
Lambda has a specific directory structure it expects for layers. For executables, they need to be placed in a bin directory inside the zip file.
Let’s create this structure and package our chosen FFmpeg binary:
# Create the directory structure for the layer!mkdir -p ffmpeg-layer/bin
# Copy the FFmpeg binary we downloaded into the correct location!cp /content/ffmpeg-n7.1-latest-linux64-lgpl-7.1/bin/ffmpeg ffmpeg-layer/bin/
# Now, create the zip archive for the layer# Navigate into the layer directory to get the zip structure right%cd ffmpeg-layer
/content/ffmpeg-layer
# verify that we are in the correct folder (ffmpeg-layer)!pwd
/content/ffmpeg-layer
# Now, zip the CONTENTS of the current directory (which is 'ffmpeg-layer')# The '*' ensures you select all files/folders directly within ffmpeg-layer# The -D flag helps to not store directory entries (sometimes helps with cleaner zips)!zip-r -D ../ffmpeg-layer.zip*
adding: bin/ffmpeg (deflated 58%)
You should now have a ffmpeg-layer.zip file in your project’s root directory. This is our Lambda Layer, ready to be deployed.
Step 2: Update the SAM Template
Next, we need to tell our template.yaml file about this new layer and attach it to our function. We also need to give our function a bit more memory and a longer timeout, as video processing is resource-intensive.
Here are the key additions to template.yaml:
Show the code
AWSTemplateFormatVersion: "2010-09-09"Transform: AWS::Serverless-2016-10-31Description: > ffmpeg-lambda-demo A simple Lambda function to process video with FFmpeg.Globals: Function: Timeout: 90# Increased timeout for video processing MemorySize: 1024# Increased memory for FFmpegResources:# The S3 bucket where our output videos will be stored OutputBucket: Type: AWS::S3::Bucket# Define the Lambda Layer FFmpegLayer: Type: AWS::Serverless::LayerVersion Properties: LayerName: ffmpeg-layer Description: FFmpeg static build for video processing ContentUri: layers/ffmpeg-layer.zip# Points to our local zip file CompatibleRuntimes:- python3.12- python3.13# The Lambda function that will run our code FFmpegFunction: Type: AWS::Serverless::Function Properties: CodeUri: src/ Handler: app.lambda_handler Runtime: python3.13 Architectures:- x86_64# Pass the bucket name to the function as an environment variable Environment: Variables: OUTPUT_BUCKET: !Ref OutputBucket# Give the function permission to write to the S3 bucket Policies:- S3WritePolicy: BucketName: !Ref OutputBucket# Attach the layer to the function Layers:-!Ref FFmpegLayerOutputs: OutputBucketName: Description: "Name of the S3 bucket for output videos" Value: !Ref OutputBucket
Step 3: Update the Lambda Function Code
This is the final piece of the puzzle. We need to update our src/app.py to perform the full workflow:
Download the horse frames into the /tmp directory (the only writable location in a Lambda function).
Use Python’s subprocess module to call the FFmpeg binary.
Upload the resulting video from /tmp to our S3 bucket.
Important Note
To use the drawtext filter, FFmpeg needs a font file. Lambda environment does not have any so you need to provide it. Download a font like Liberation Sans, and place LiberationSans-Regular.ttf inside a new src/fonts/ directory. We will package this font with our function code.
Here is the final src/app.py:
Show the code
# src/app.pyimport osimport boto3import requestsimport subprocessOUTPUT_BUCKET = os.environ.get("OUTPUT_BUCKET")s3_client = boto3.client("s3")TMP_DIR ="/tmp"def download_frames():"""Downloads the 15 horse frames into /tmp/video_frames""" frames_dir = os.path.join(TMP_DIR, "video_frames") os.makedirs(frames_dir, exist_ok=True) base_url ="https://raw.githubusercontent.com/hassaanbinaslam/myblog/5c15e72dde03112c5c8dea177bfed7c835aca399/posts/images/2025-07-28-the-horse-in-motion-ffmpeg-gotchas-part-1/video_frames"for i inrange(1, 16): frame_number =str(i).zfill(2) image_url =f"{base_url}/frame{frame_number}.png" response = requests.get(image_url)if response.status_code ==200:withopen(os.path.join(frames_dir, f"frame{frame_number}.png"), "wb") as f: f.write(response.content)print("All frames downloaded.")# print("List the files names downloaded")# print(os.listdir(frames_dir))def lambda_handler(event, context):try:print("Starting video creation process...") download_frames()# Paths in the Lambda's writable /tmp directory input_path = os.path.join(TMP_DIR, "video_frames/frame%02d.png") output_path = os.path.join(TMP_DIR, "output.mp4")# Path to the font file packaged with our function font_file ="./fonts/LiberationSans-Regular.ttf"# When a layer is used, its contents are available in the /opt directory.# Our FFmpeg binary is therefore at /opt/bin/ffmpeg. ffmpeg_cmd = ["/opt/bin/ffmpeg","-stream_loop","-1","-framerate","1.5","-i", input_path,"-vf",f"drawtext=fontfile={font_file}:text='The Horse in Motion and FFmpeg Gotchas Part 2':fontcolor=white:fontsize=13:box=1:boxcolor=black@0.8:boxborderw=5:x=(w-text_w)/2:y=(h-text_h)/2:enable='between(t,0,10)'","-c:v","libopenh264", # Use the alternate H.264 encoder"-r","30","-pix_fmt","yuv420p","-t","40", output_path, ]print(f"Running FFmpeg command: {' '.join(ffmpeg_cmd)}")# Execute the FFmpeg command result = subprocess.run(ffmpeg_cmd, capture_output=True, text=True, check=True)print("FFmpeg stdout:", result.stdout)print("FFmpeg stderr:", result.stderr)print(f"FFmpeg command successful. Uploading {output_path} to S3.") s3_client.upload_file(output_path, OUTPUT_BUCKET, "horse-in-motion.mp4")return {"statusCode": 200,"body": "Successfully created and uploaded horse-in-motion.mp4 to S3.", }except subprocess.CalledProcessError as e:print("FFmpeg failed to execute.")print("Return code:", e.returncode)print("stdout:", e.stdout)print("stderr:", e.stderr)raise eexceptExceptionas e:print(e)raise e
Finally, make sure your src/requirements.txt file also includes requests:
boto3
requests
Step 4: Deploy and Test
With all the pieces in place, we can deploy our application.
# Build the application, including the layer and function codesam build# Deploy the changes to your AWS accountsam deploy
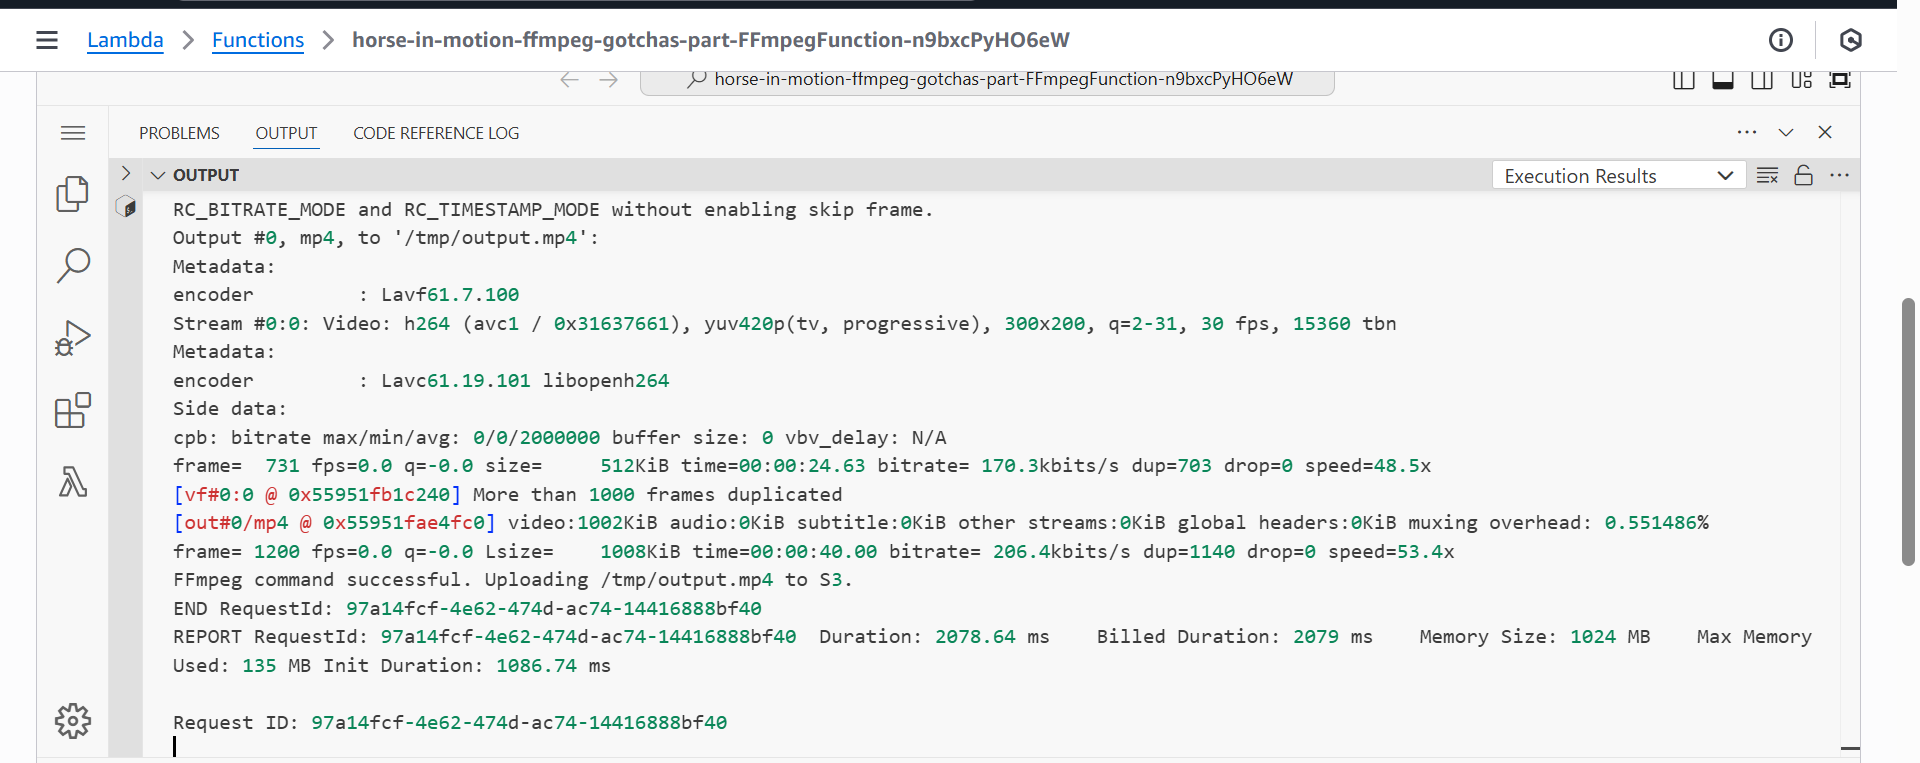
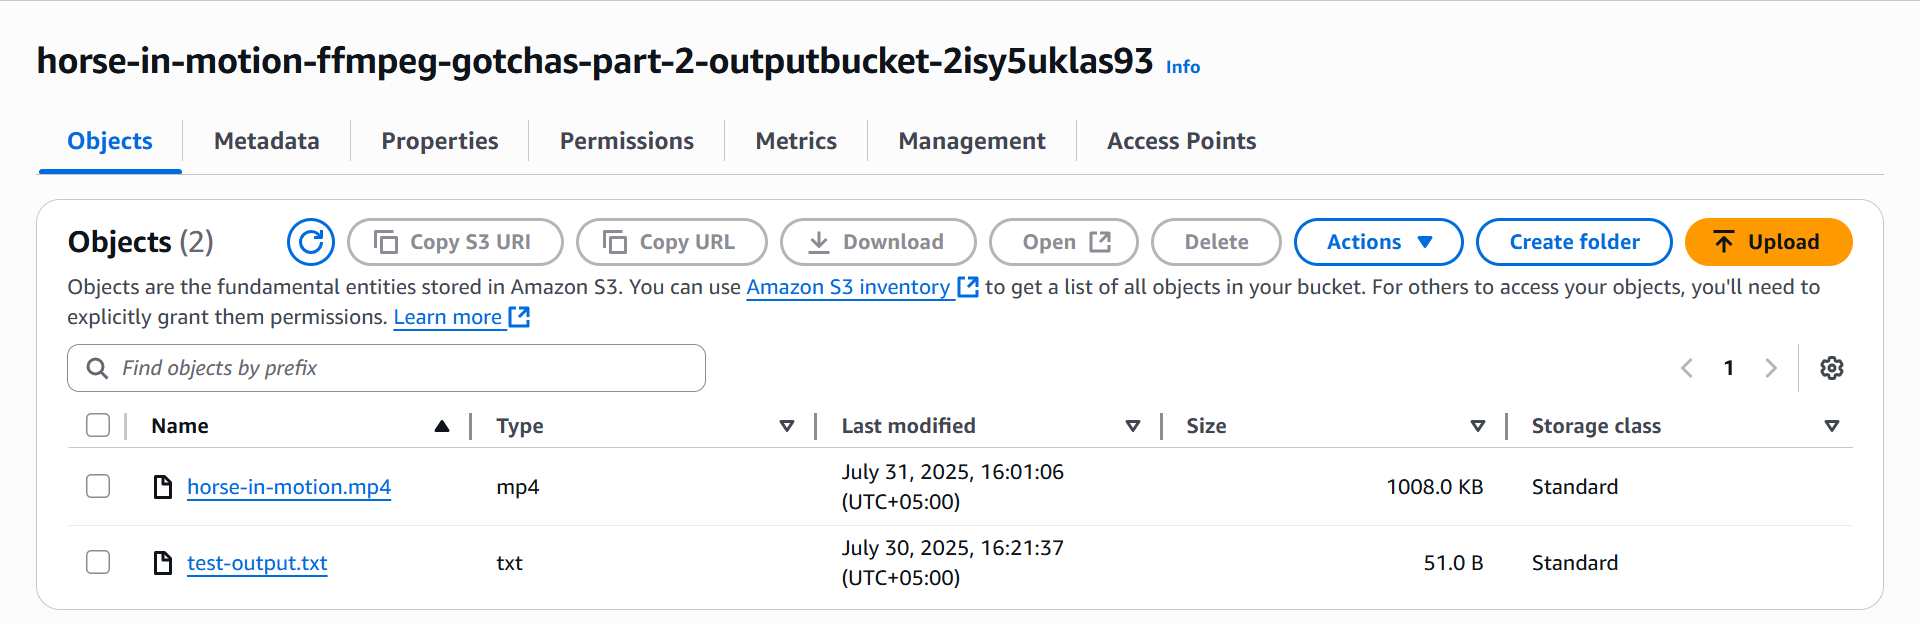
Once the deployment is complete, navigate to the AWS Lambda console, find the function, and invoke it with a test event. Monitor the logs in CloudWatch. If everything works as expected, you will see the logs from the print statements, and a new file named horse-in-motion.mp4 will appear in your S3 bucket!
Our serverless journey is complete! We successfully migrated our FFmpeg process from a local notebook to a scalable AWS Lambda function. Along the way, we navigated some of the most common real-world gotchas of working with FFmpeg in a constrained environment:
Finding the Right Build: We learned that not all static builds are created equal and that verifying the presence of specific codecs and filters is a critical first step.
Managing Dependencies: We discovered that a build might have one feature we need (drawtext) but lack another (libx264), forcing us to adapt and use alternatives like libopenh264.
Lambda Environment Constraints: We saw the importance of using the /tmp directory for file operations and learned how to package and access binaries and other assets using Lambda Layers.
By packaging FFmpeg as a layer, you now have a reusable, serverless video processing engine that you can use to build powerful on-demand media applications.