Serverless Inference with SageMaker Serverless Endpoints
aws
ml
sagemaker
How to call an ML model endpoint hosted by SageMaker using serverless technology.
Published
June 17, 2022
About
You have trained and deployed a model using Amazon SageMaker. You have an endpoint and now you are wondering “After I deploy an endpoint, where do I go from there?” Your concerns are valid because SageMaker endpoints are not public but are scoped to an individual account. In this post, we will discuss how to make them public using AWS serverless technologies: AWS Lambda and Function URL. We will also make our endpoints serverless so our ML inference solution is serverless end-to-end.
Introduction
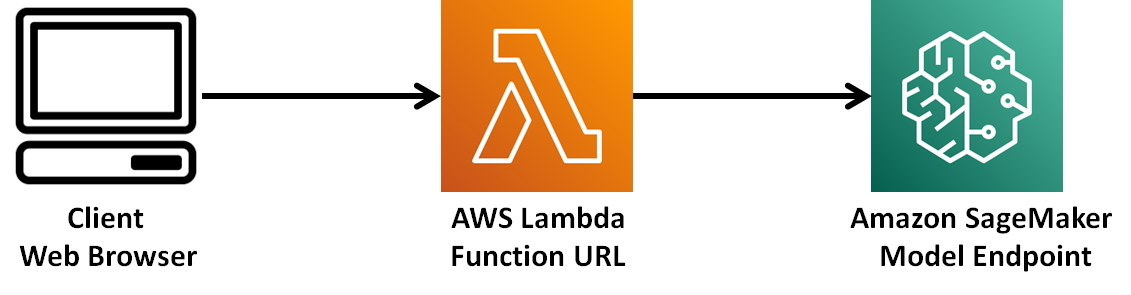
The following diagram shows how a model is called using AWS serverless architecture.
Starting from the client, an application calls the AWS Lambda Function URL and passes parameter values. The Lambda function parses the request and passes it to SageMaker model endpoint. This endpoint can be hosted on an EC2 instance or you have the option to make it serverless. Serverless endpoints behave similarly to Lambda functions. Once a request is received by the endpoint it will perform the prediction and return the predicted values to Lambda. The Lambda function then parses the returned values and sends the final response back to the client.
Note that this post assumes that you have already trained a model and is available in SageMaker model repository.
Deploy SageMaker Serverless Endpoint
Through SageMaker Console UI
Let’s first deploy our serverless endpoint through SageMaker console UI. In the next section, we will do the same through SageMaker Python SDK.
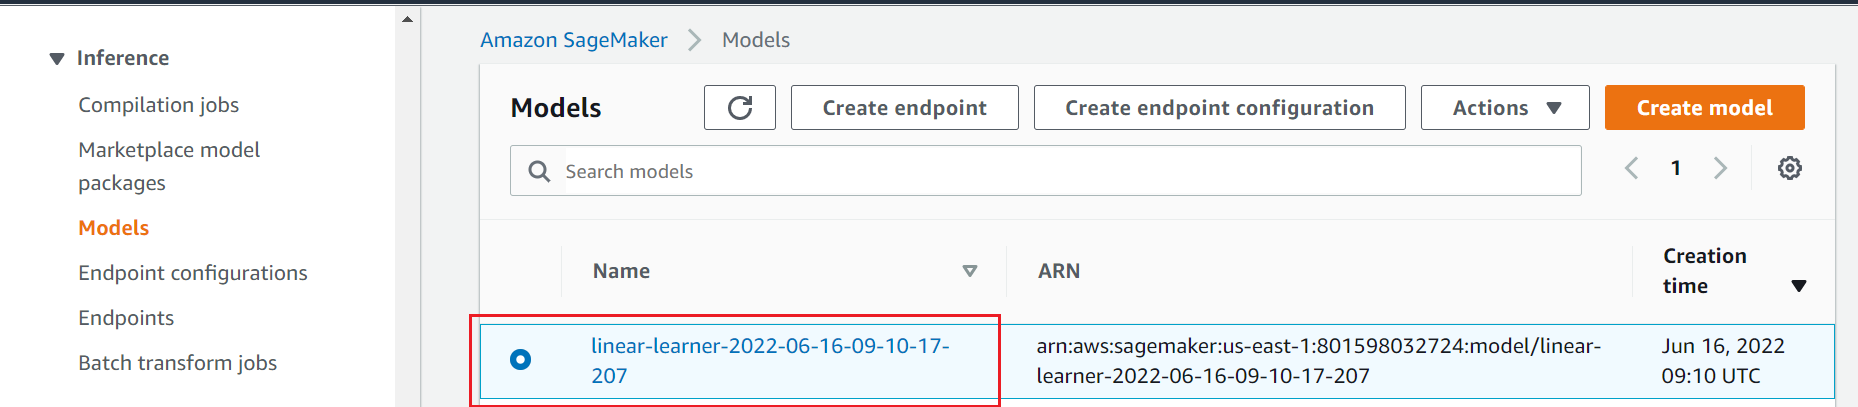
Visit the SageMaker model repository to find the registered Linear Learner model. You can find the repository on the SageMaker Inference > Model page.
model-repo
Note the mode name linear-learner-2022-06-16-09-10-17-207 as will need it in later steps.
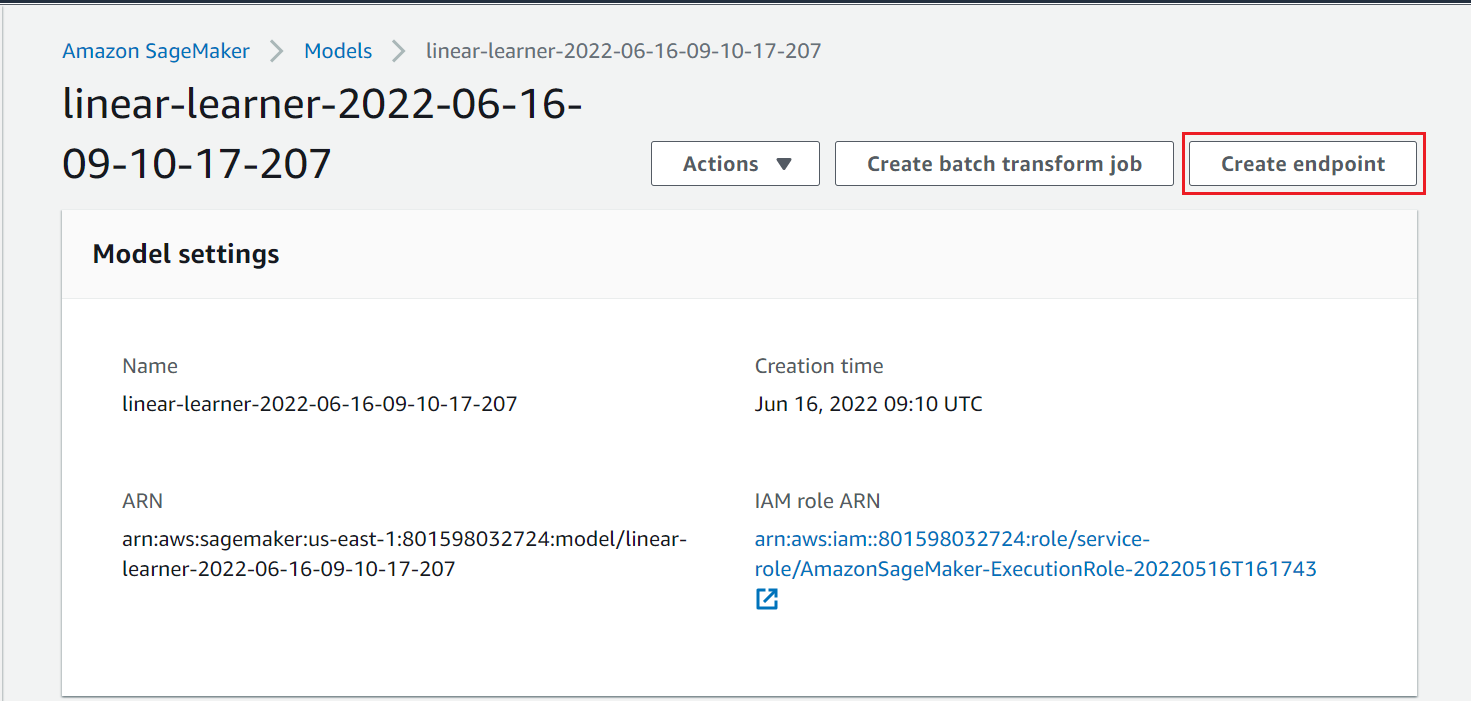
Click on the model name and then Create endpoint
create-endpoint
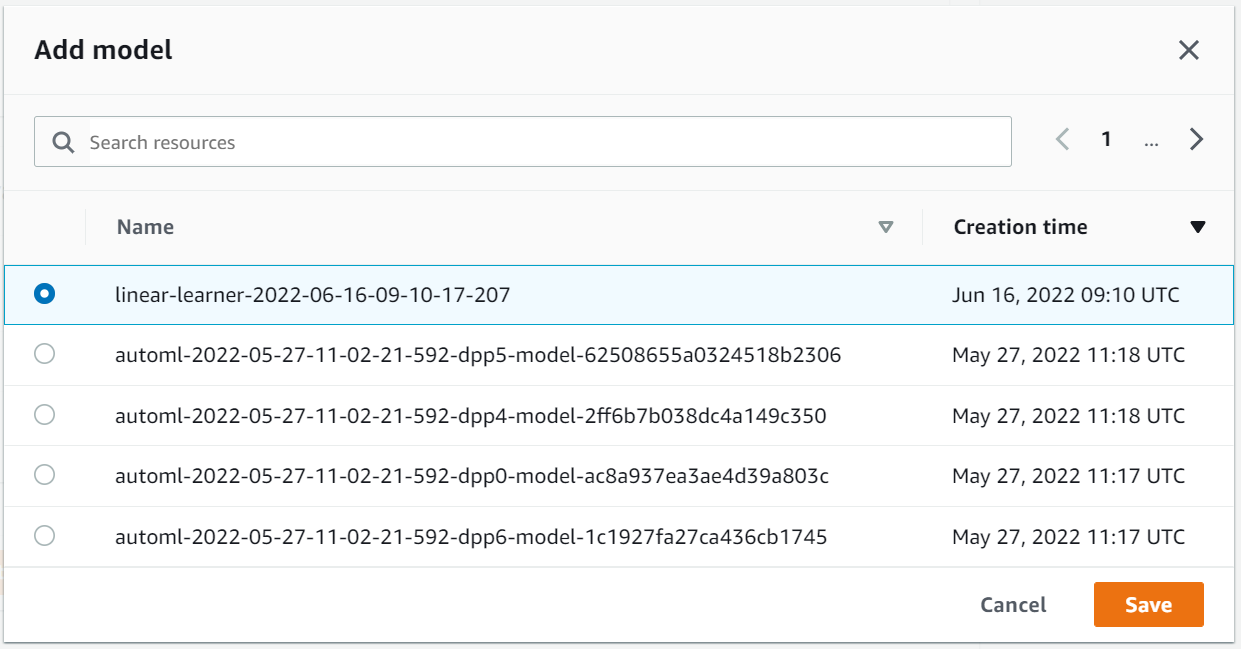
This will take you to configure endpoint page. Here do the following configurations. * Set Endpoint name to 2022-06-17-sagemaker-endpoint-serverless. You may use any other unique string here. * From Attach endpoint configuration select create a new endpoint configuration * From New endpoint configuration > Endpoint configuration set * Endpoint configuration name to config-2022-06-17-sagemaker-endpoint-serverless. You may use any other name here. * Type of endpoint to Serverless * From Production variants click on Add Model and then select the model name we want to deploy. In our case it is linear-learner-2022-06-16-09-10-17-207. Click Save.
add-model
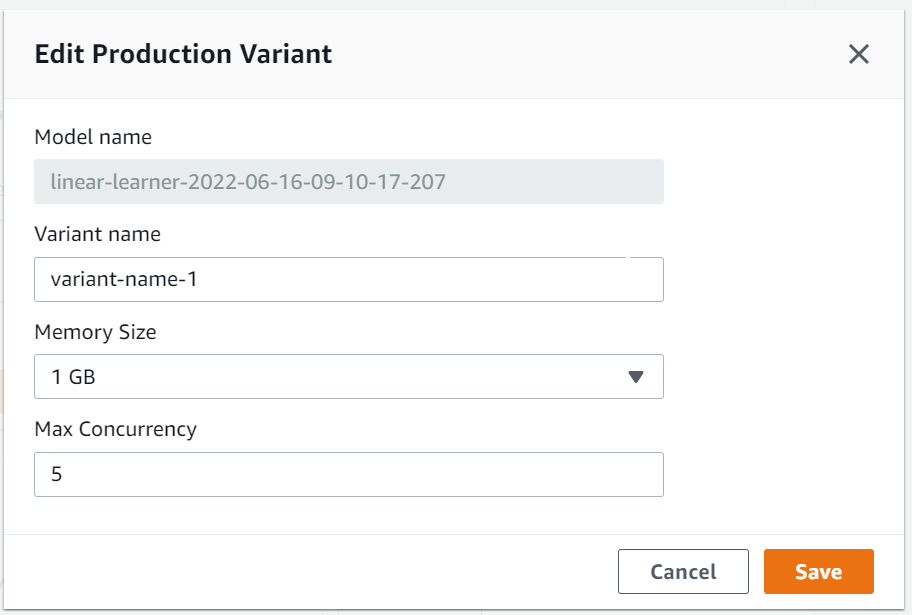
Then Edit the Max Concurrency and set it to 5.
max-concurrency
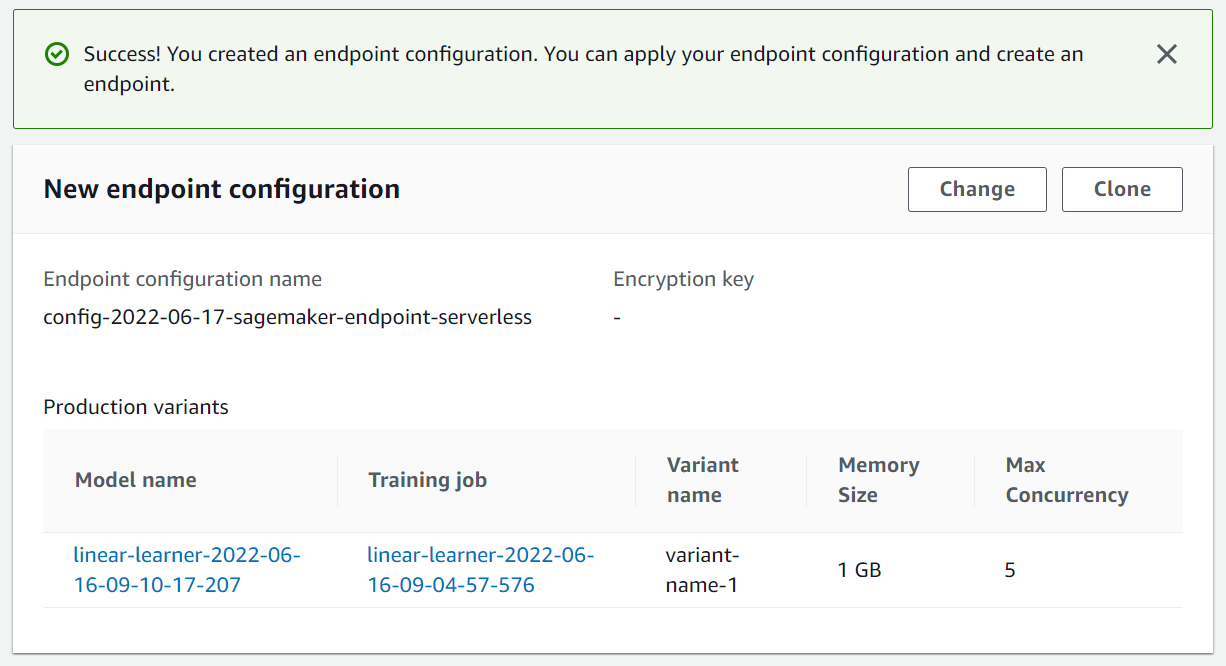
Click Create endpoint configuration
new-endpoint-config
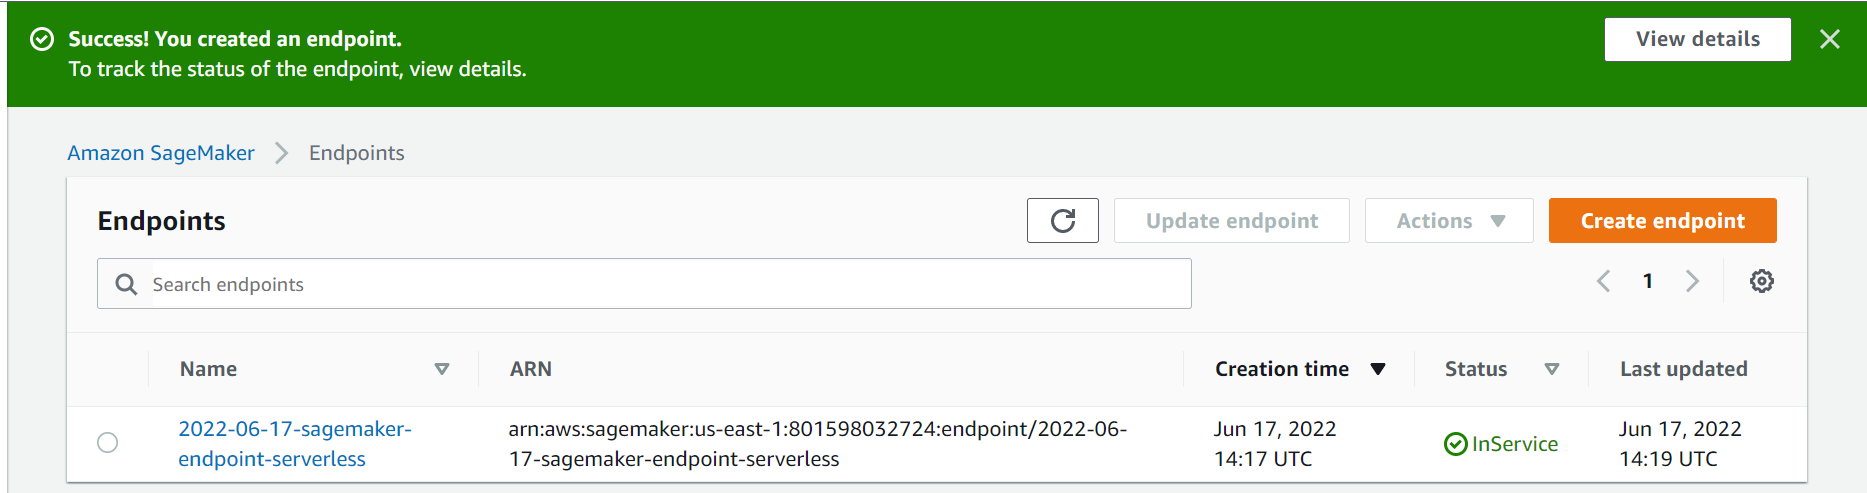
Click Create endpoint
endpoint-created
It will take a minute for the created endpoint to become ready.
While we were configuring the concurrency for our endpoint we have given it a value of 5. This is because at this point there is a limit on concurrency per account across all serverless endpoints. The maximum total concurrency for an account is 20, and if you cross this limit you will get an error as shown below.
serverless-endpoints-concurrency-error
Through SageMaker Python SDK
Let’s create another endpoint but using SageMaker SDK. Deploying a model to a serverless endpoint using SDK involves the following steps: * Get session to SageMaker API * Create a serverless endpoint deployment config * Create a reference to a model container * Deploy the model on a serverless endpoint using serverless configuration
Let’s do it now.
### get a session to sagemaker apiimport sagemakersession = sagemaker.Session()role = sagemaker.get_execution_role()print(f"sagemaker.__version__: {sagemaker.__version__}")print(f"Session: {session}")print(f"Role: {role}")
sagemaker.__version__: 2.88.1
Session: <sagemaker.session.Session object at 0x7feb1853fc10>
Role: arn:aws:iam::801598032724:role/service-role/AmazonSageMaker-ExecutionRole-20220516T161743
Note that here we are only defining the endpoint configuration. It will be created when we will deploy the model. Also, note that we have not passed any configuration name. It will default to the endpoint name. To read more about the serverless inference configuration read the documentation ServerlessInferenceConfig
I could not find a way to give a name to endpoint configuration from SageMaker SDK. Let me know in the comments if there is a way to do it.
### create a SageMaker model. # In our case model is already registered so it will only create a reference to itfrom sagemaker.model import Modelll_model = Model( image_uri ='382416733822.dkr.ecr.us-east-1.amazonaws.com/linear-learner', # find it from the SageMaker mode repository name ='linear-learner-2022-06-16-09-10-17-207', role=role)
While creating a SageMaker model you need to provide its container URI, name, and role. The role gives necessary permissions to SageMaker to pull the image container from the ECR repository. To read more about the Model read the docs sagemaker.model.Model
### define the endpoint nameendpoint_name ='2022-06-17-sagemaker-endpoint-serverless-sdk'
### deploy the model to serverless endpointll_model.deploy( endpoint_name=endpoint_name, serverless_inference_config=serverless_config,)
Using already existing model: linear-learner-2022-06-16-09-10-17-207
-----!
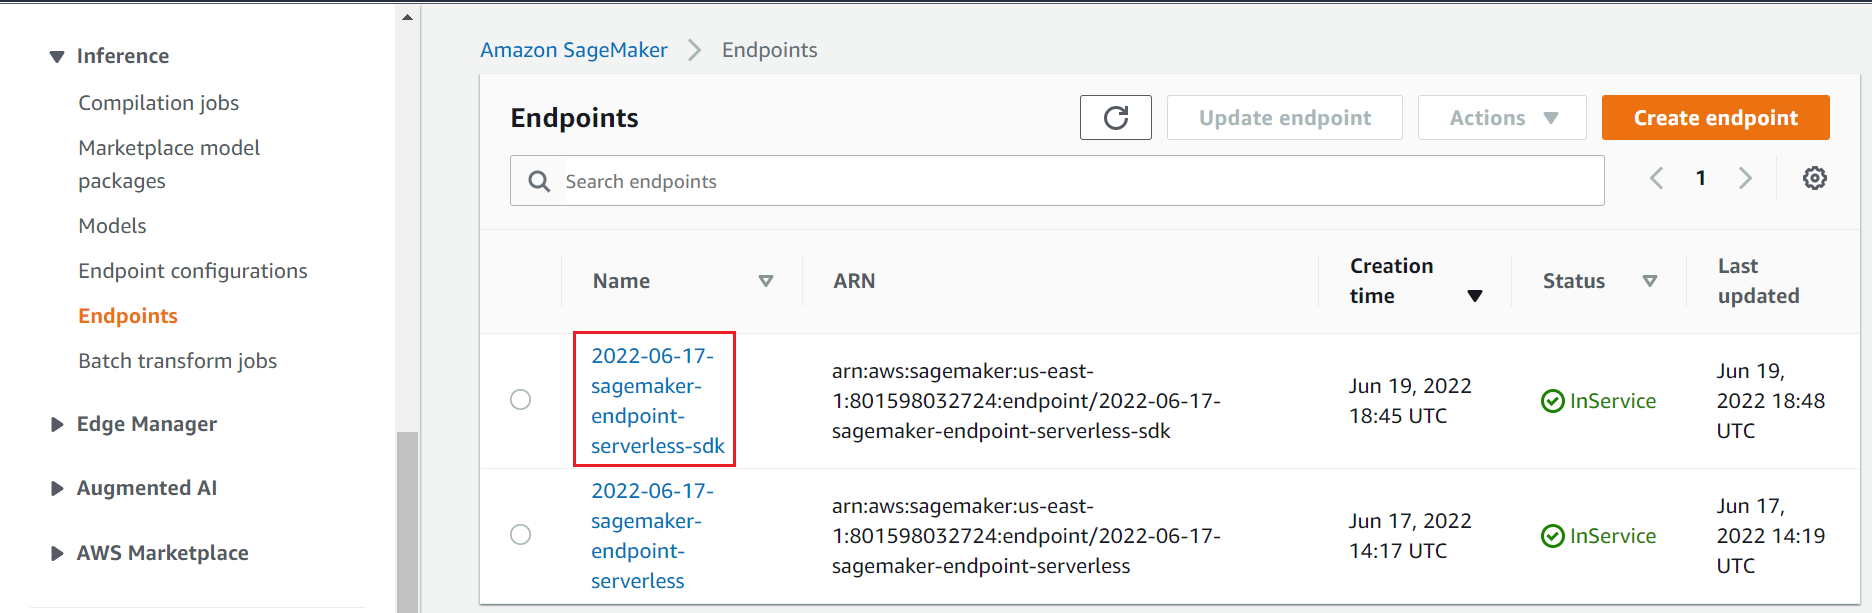
It will take a minute or so for the serverless endpoint to get provisioned. Once it is ready (InService) you will find it on the SageMaker Inference > Endpoints page.
endpoint-created-sdk
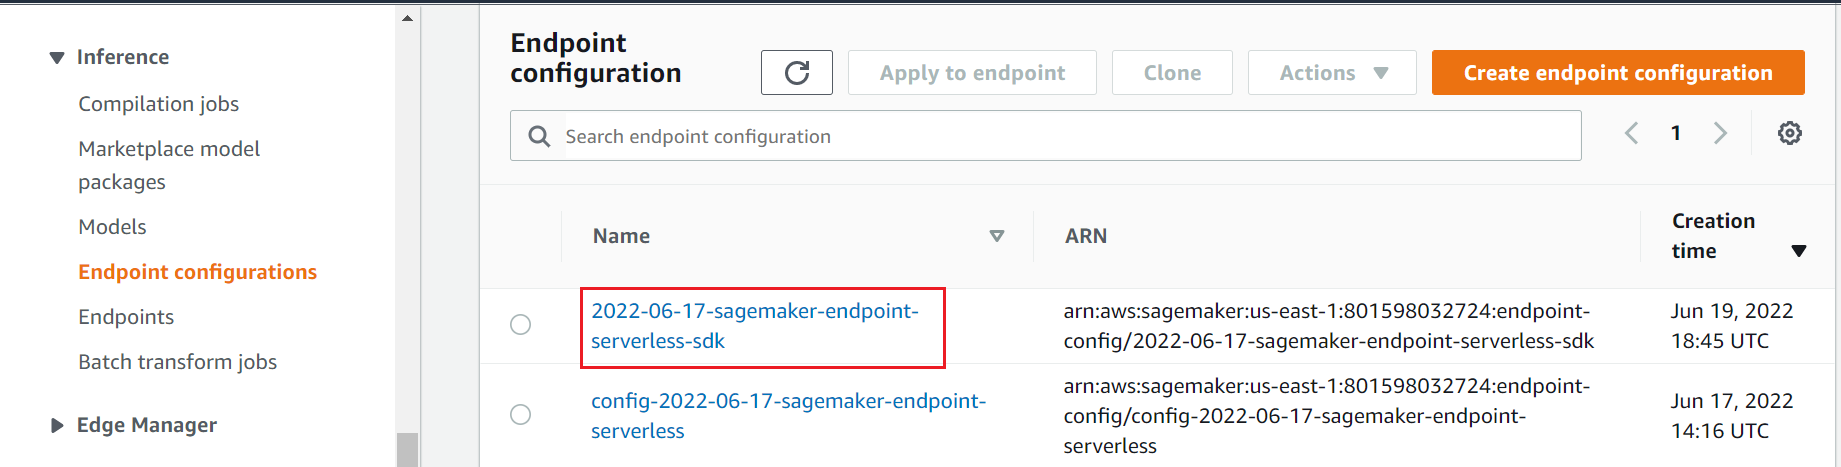
model.deploy() command will also create the endpoint configuration with same name as endpoint, and it can be found on SageMaker Inference > Endpoint configurations page
new-endpoint-config-sdk
Deploy Lambda Function with Function URL
Our model’s serverless endpoint is ready, and in this section we will make it public using AWS Lambda and Function URL. Let’s create our Lambda Function.
From AWS Lambda console, click Create Function and make the following configurations.
Under Basic Information * Function name = ‘linear-learner-boston-demo’ * Runtime = ‘Python 3.9’ * Execution Role = ‘Create a new role with basic Lambda permissions’
Under Advanced Settings * Check ‘Enable function URL’ * ‘Auth type’ to None. This is for demo purposes.
Click Create Function
Once the function is created click on it to open its page.
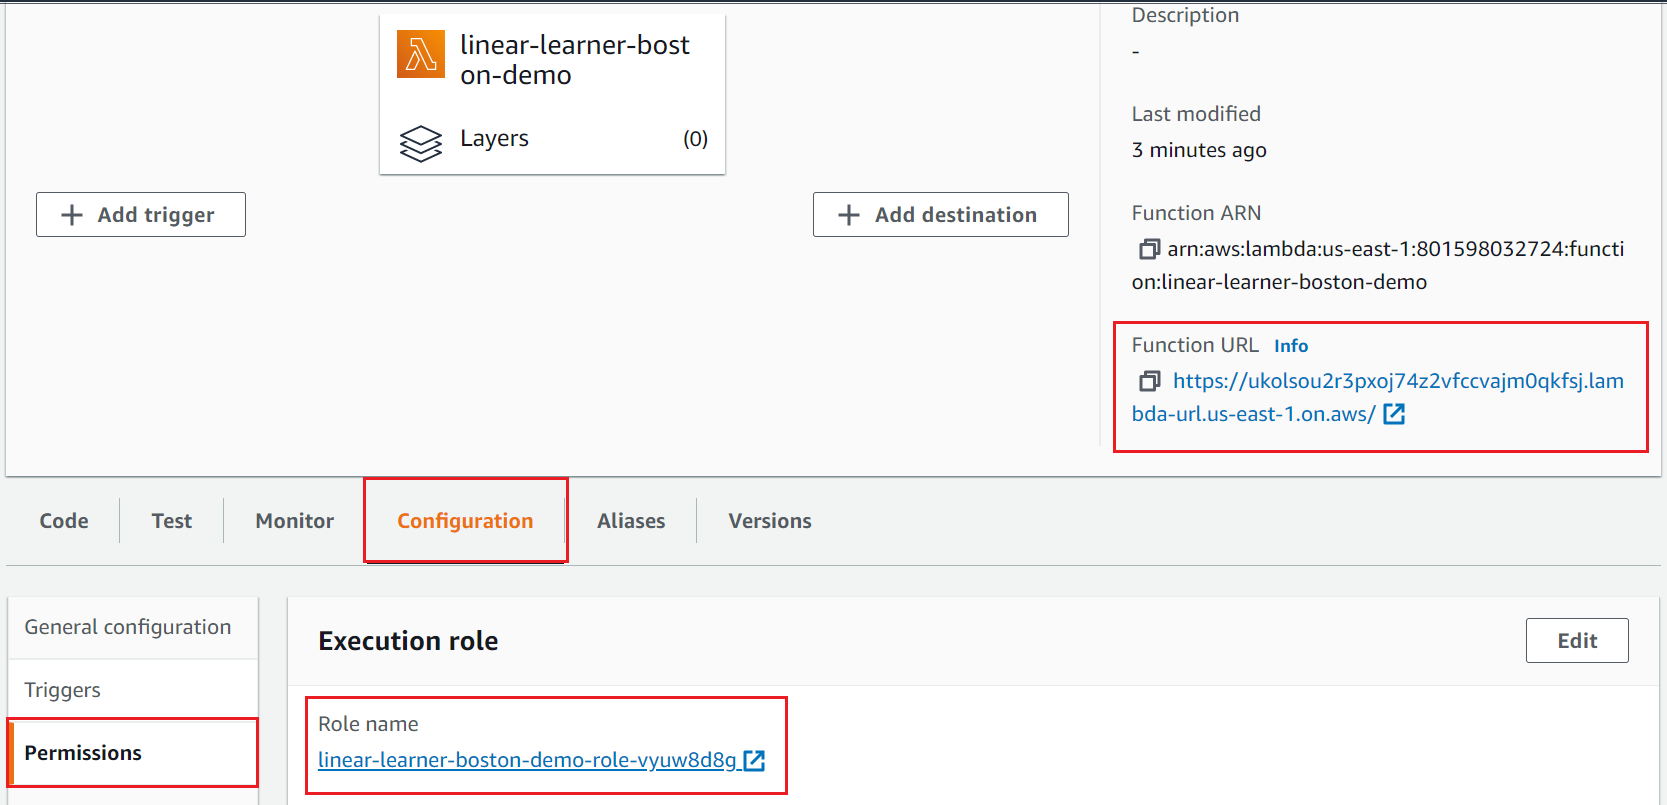
Under Function Overview on the bottom right there is a Function URL that we can call to access it publically.
lambda-function-created
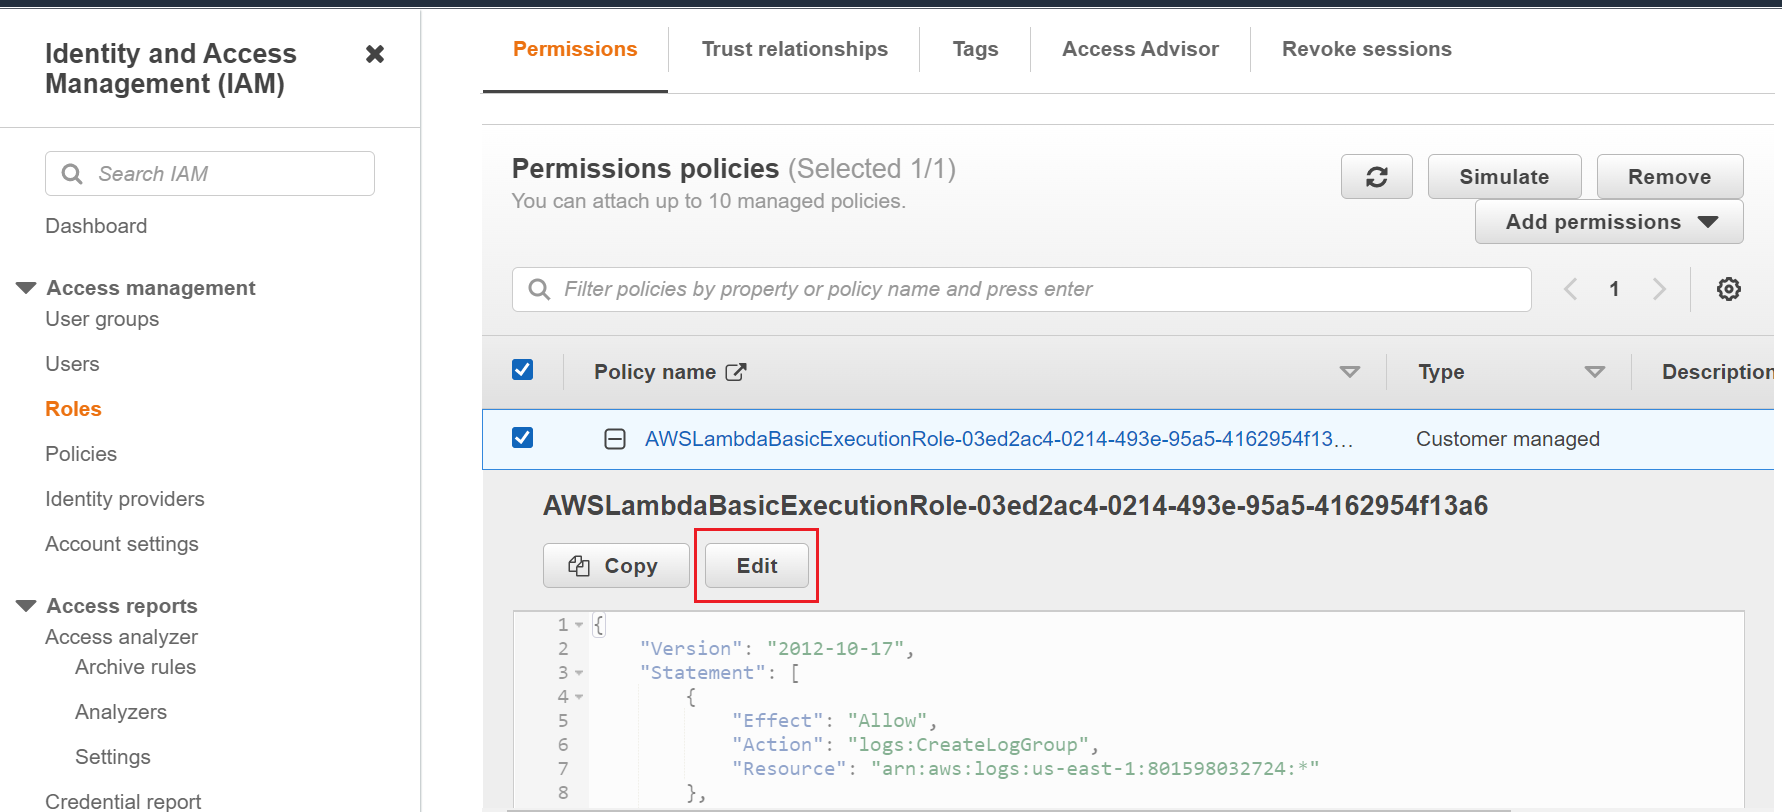
For our function to call SageMaker endpoint we first need to give it some extra permissions. For this click on the Lambda Configurations > Permissions > Role name. This will open the IAM page for the Role, and the Policies under that role. Select the Policy attached to this Role and Click Edit.
iam-policy
On the next page add the following permissions to your policy.
use boto3 SDK to create a session with SageMaker API. We did not use SageMaker SDK here because it is not available in the Lambda environment as of now. You may read more about it here sagemaker-python-sdk in AWS Lambda
then we have defined the endpoint name that we want to call from this function
in the lambda handler we have parsed the request to get the payload
next we have invoked the serverless endpoint with the payload
then we parsed the response to get the predictions
finally we have returned the prediction
Note that in the endpoint we have used 2022-06-17-sagemaker-endpoint-serverless-sdk which we have created through SageMaker SDK. You may also use 2022-06-17-sagemaker-endpoint-serverless which we created from UI as both point to the same model.
Let’s deploy our function code, and create a test event. Give it a name and use the following event body
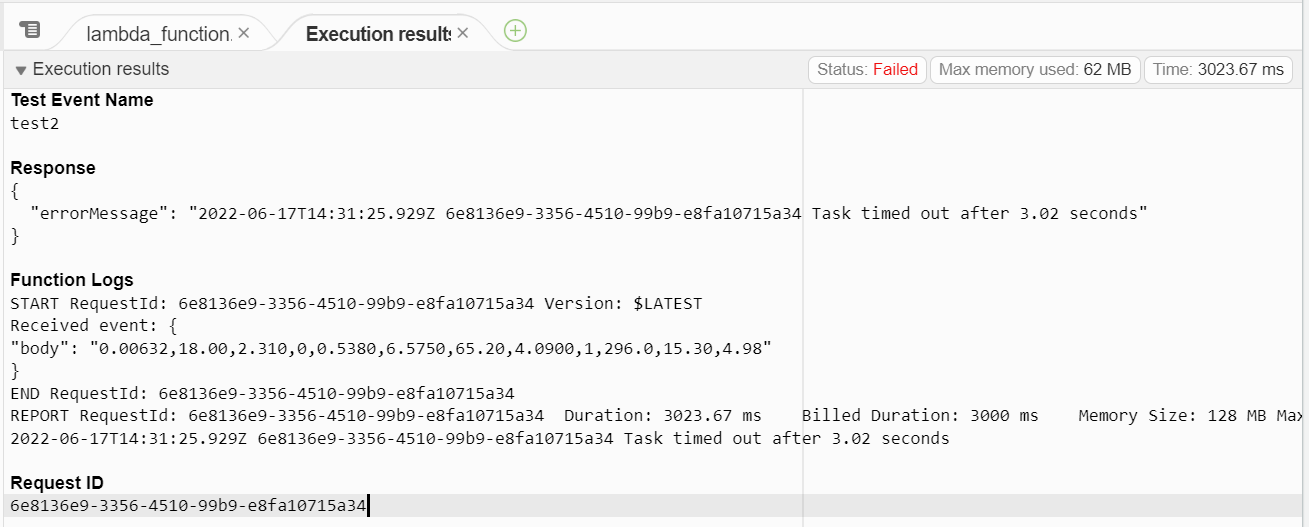
Now test it. The first time I tested it I got a timeout exception. The reason for this is that the default timeout for the Lambda function is 3 seconds. But when the function called serverless endpoint it could not get any response during that time window. This is because of a cold start for the serverless endpoint.
If your endpoint does not receive traffic for a while and then your endpoint suddenly receives new requests, it can take some time for your endpoint to spin up the compute resources to process the requests. This is called a cold start. Since serverless endpoints provision compute resources on demand, your endpoint may experience cold starts. A cold start can also occur if your concurrent requests exceed the current concurrent request usage. The cold start time depends on your model size, how long it takes to download your model, and the start-up time of your container.
lambda-coldstart-timeout
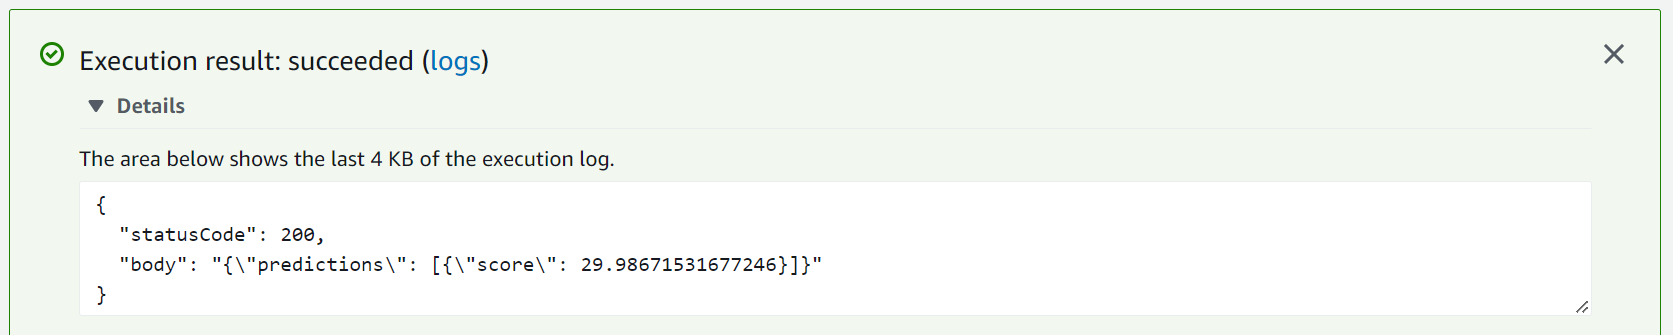
On the next test event I got a successful response from the Lambda function as shown below.
lambda-event-success
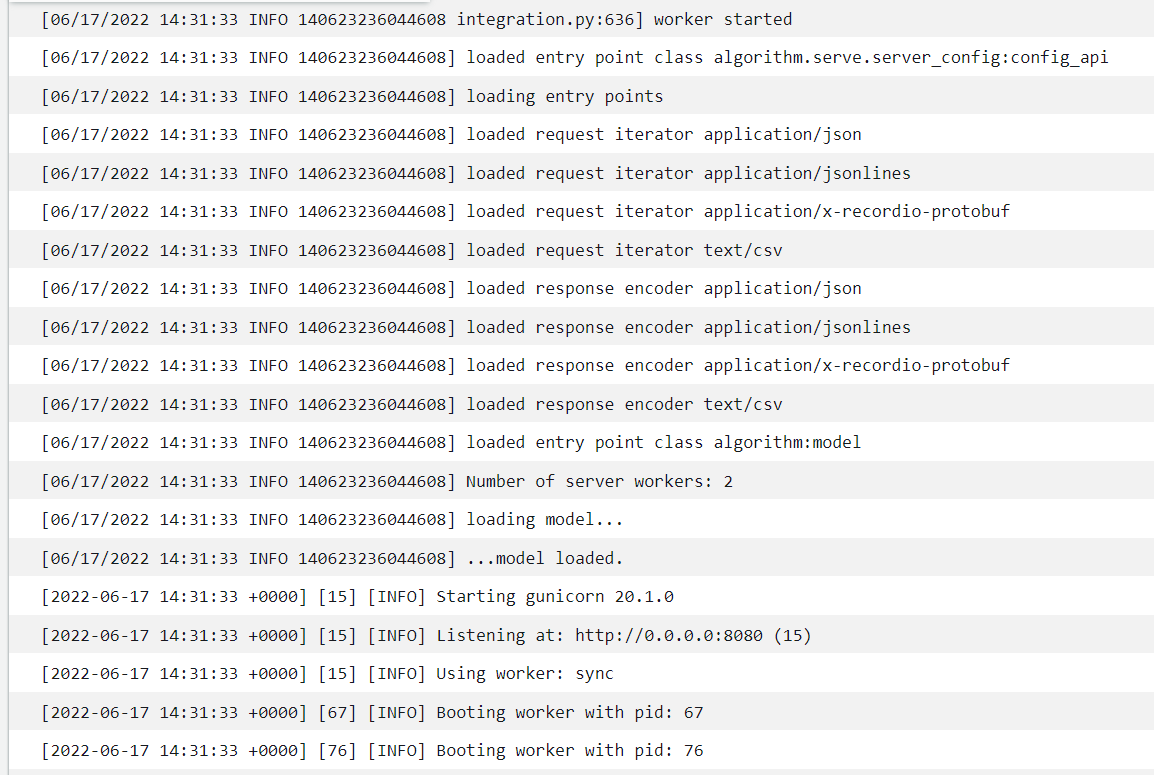
You can find the logs for your serverless endpoint on AWS CloudWatch under log group /aws/sagemaker/Endpoints/[endpoint-name]. In our case it will be /aws/sagemaker/Endpoints/2022-06-17-sagemaker-endpoint-serverless. If you look at the logs you will find that serverless endpoint is doing the following steps:
loading request and response encoders
loading the model
starting a gunicorn server
starting a server listener
making prediction
returning results
cloudwatch-logs
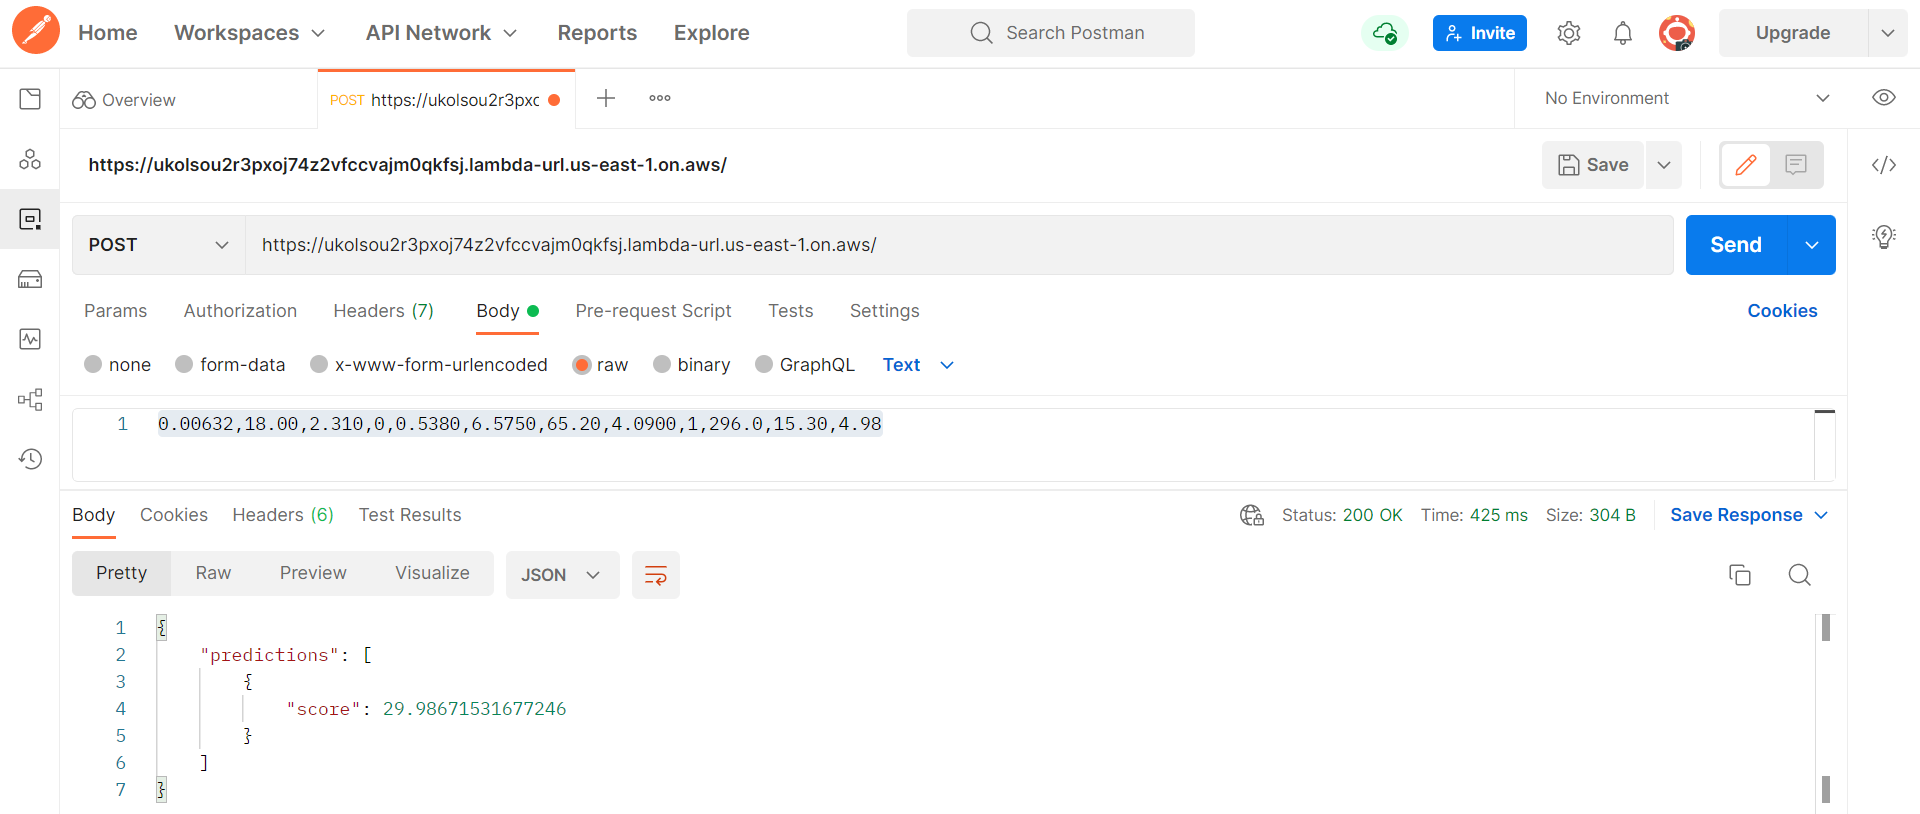
Test Serverless Inference through Postman
At this point our inference endpoint is ready to be consumed from external applications. Let’s use Postman for testing. Copy the lambda function URL and paste it in Postman Request UI. For the body use the following text.