Data Preparation with SageMaker Data Wrangler (Part 2)

Enviornment
This notebook is prepared with Amazon SageMaker Studio using Python 3 (Data Science) Kernel and ml.t3.medium instance.
About
This is a detailed guide on using AWS SageMaker Data Wrangler service to prepare data for machine learning models. SageMaker Data Wrangler is a multipurpose tool with which you can * import data from multiple sources * explore data with visualizations * apply transformations * export data for ml training
This guide is divided into five parts * Part 1: Prepare synthetic data and place it on multiple sources * Part 2: Import data from multiple sources using Data Wrangler (You are here) * Part 3: Explore data with Data Wrangler visualizations * Part 4: Preprocess data using Data Wrangler * Part 5: Export data for ML training
Part 2: Import data from multiple sources using Data Wrangler
In this post, we will create SageMaker Data Wrangler Flow pipeline to import data from multiple sources. Once data is imported, we will then add a step to join the data into a single dataset that can be used for training ML models.
Launch SageMaker Data Wrangler Flow
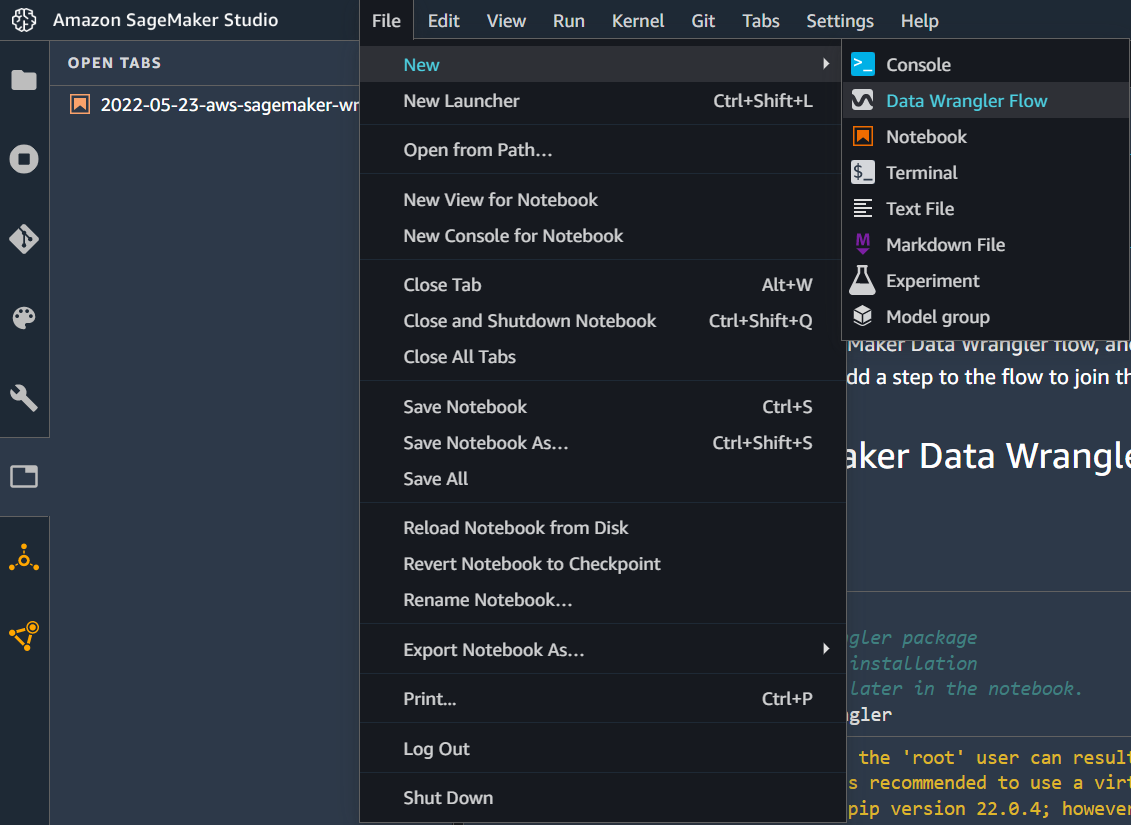
Create a new Data Wrangler flow by clicking on the main menu tabs File > New > Data Wrangler Flow.
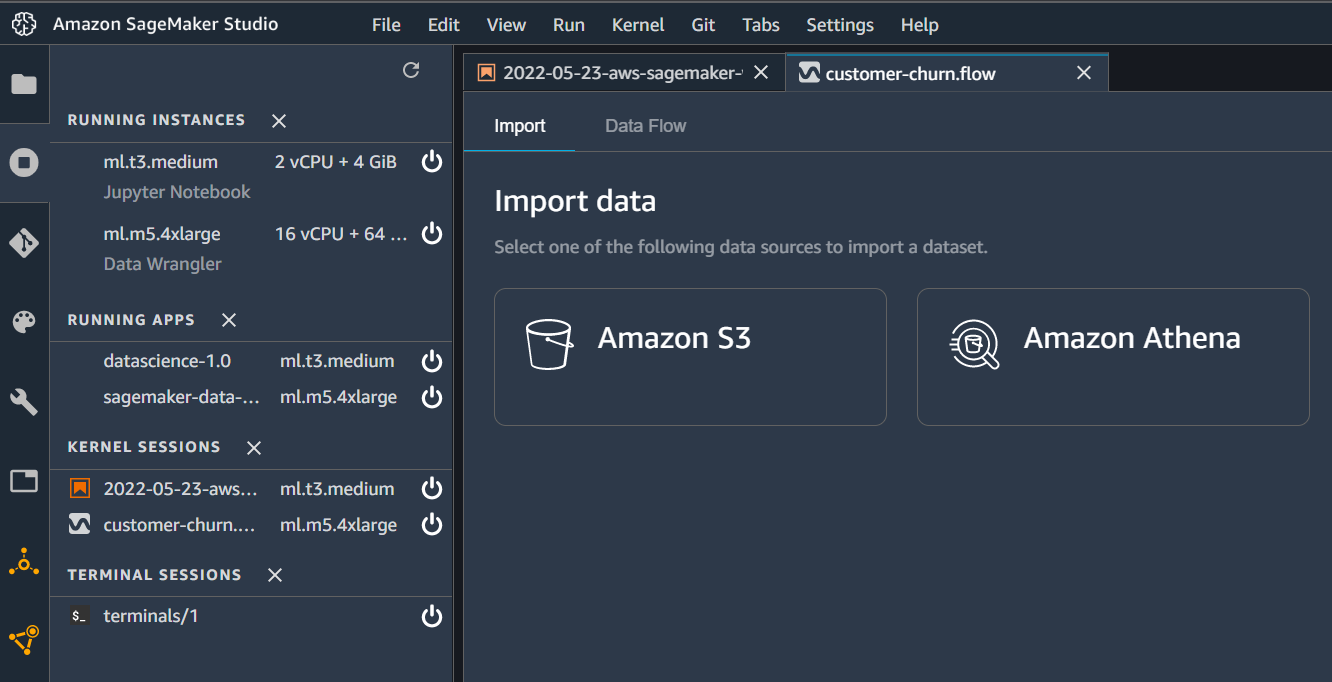
Once launched SageMaker may take a minute to initialize a new flow. The reason for this is SageMaker will launch a separate machine in the background ml.m5.4xlarge with 16vCPU and 64 GiB memory for processing flow files. A flow file is a JSON file that just captures all the steps performed from the Flow UI console. When you execute the flow, the Flow engine parses this file and performs all the steps. Once a new flow file is available, rename it to customer-churn.flow.
Import data from sources
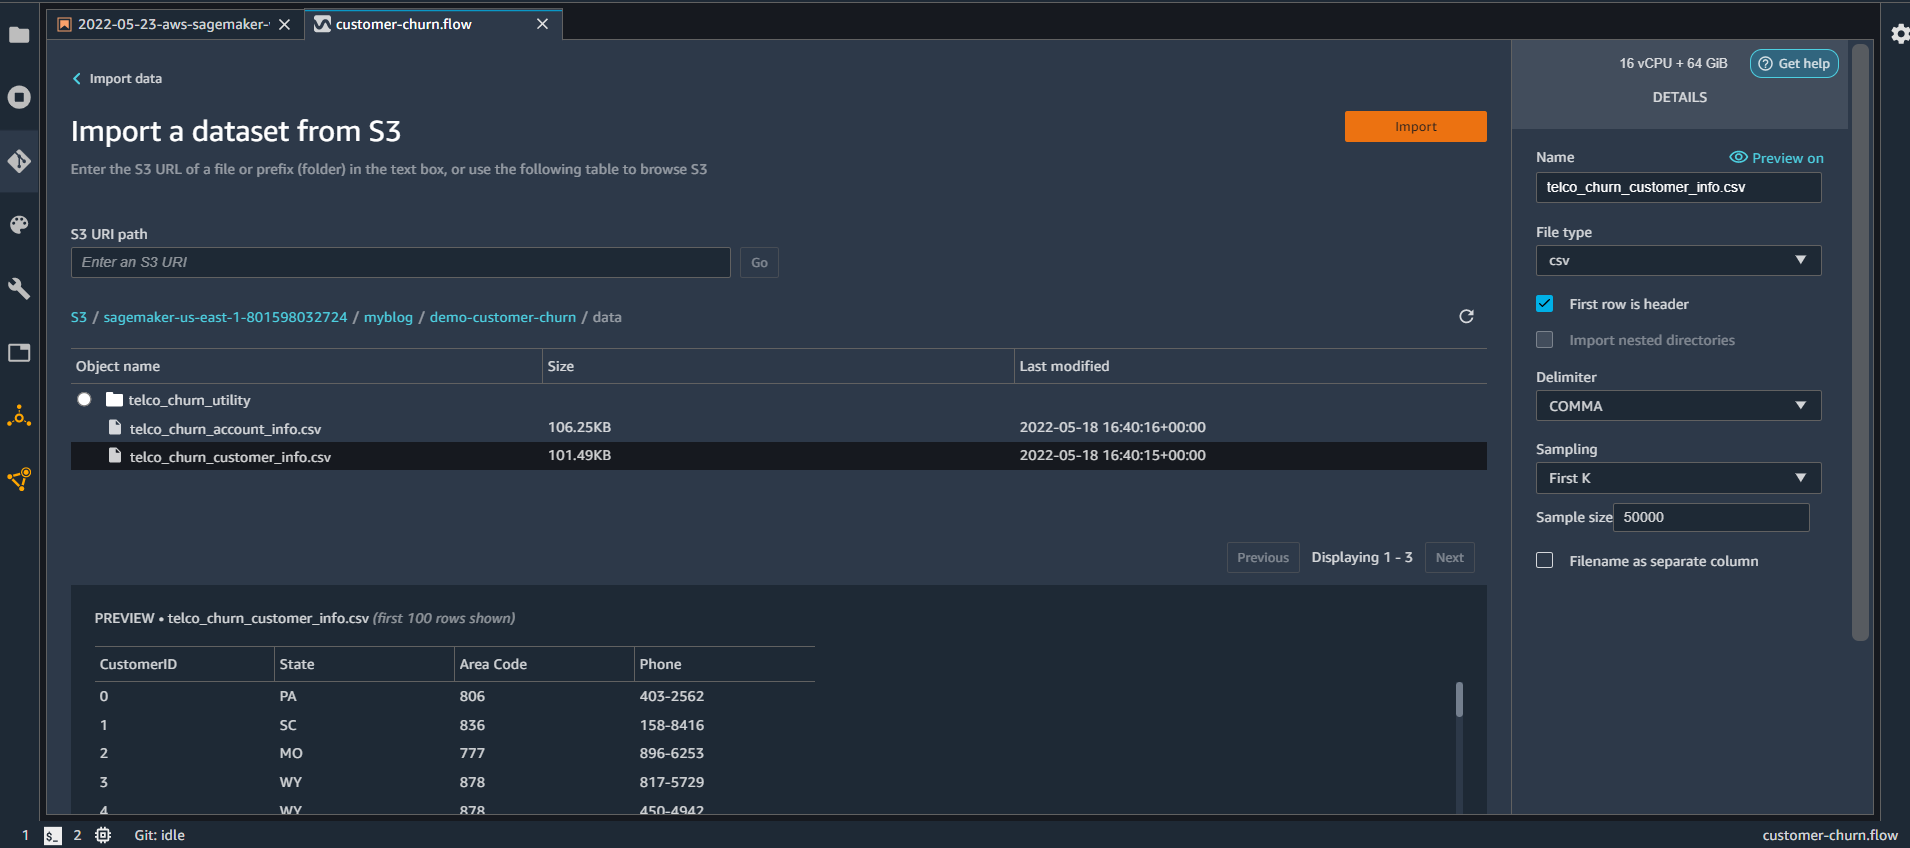
First, we will create a flow to import data (created in the part-1 post) from S3 bucket. For this from the flow UI click on Amazon S3 bucket. From the next window select the bucket name S3://sagemaker-us-east-1-801598032724. In your case, it could be different where you have stored the data. From the UI select the filename “telco_churn_customer_info.csv” and click Import
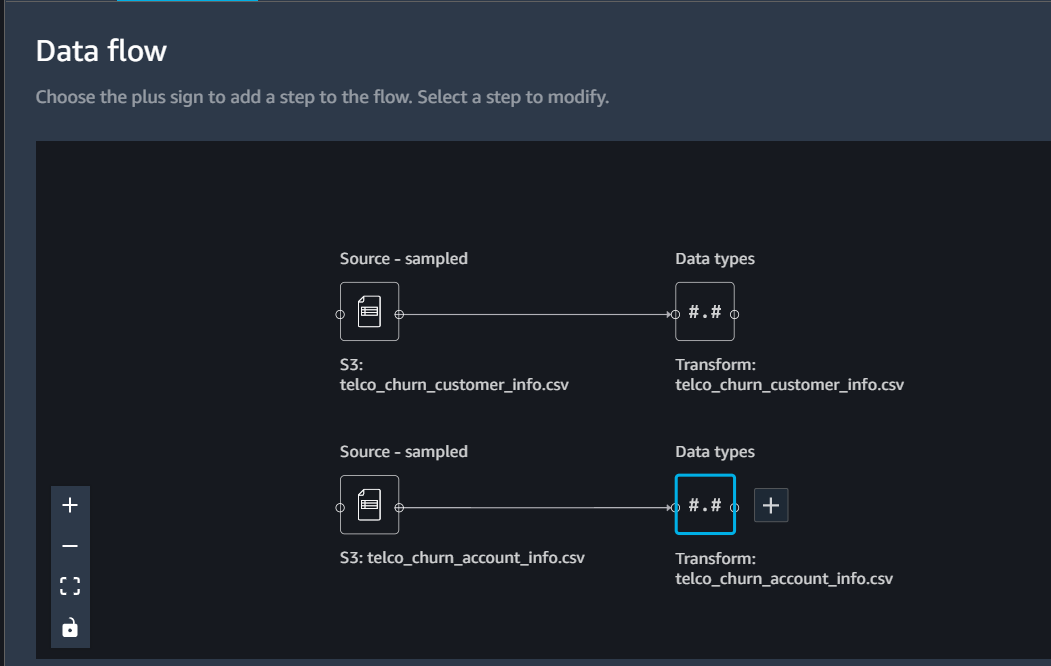
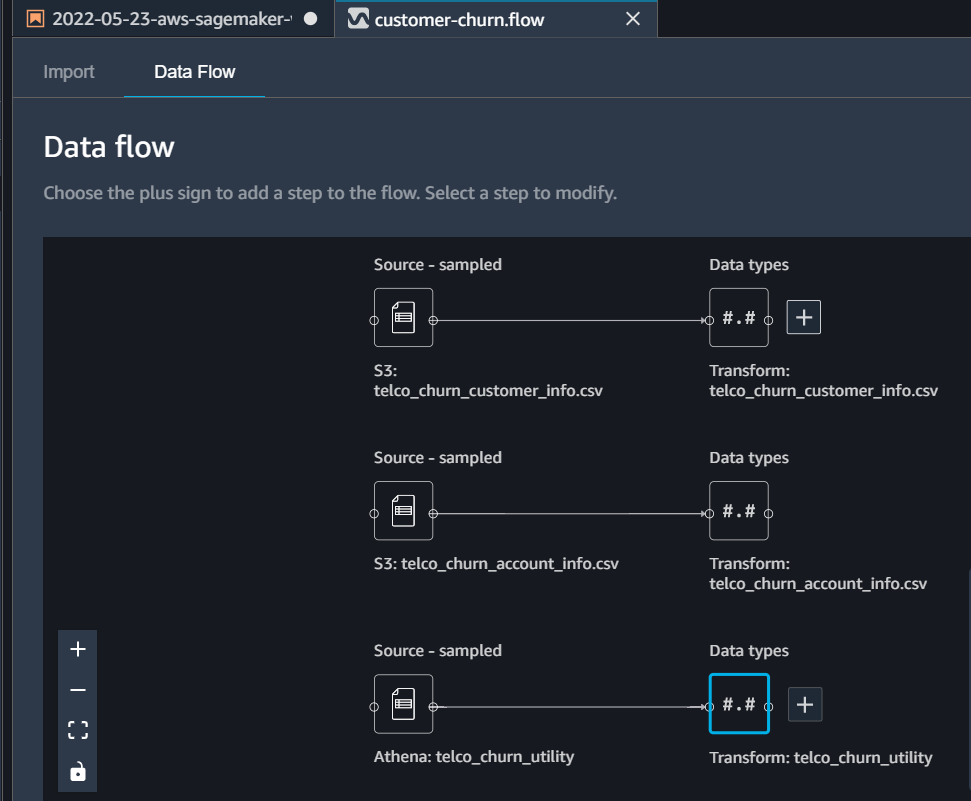
Once the data is imported repeat the steps for the filename “telco_churn_account_info.csv”. If you are not seeing the “import from S3 bucket” option on the UI then check the flow UI and click on the ‘Import’ tab option. Once both files are imported, your Data Flow tab will look similar to this
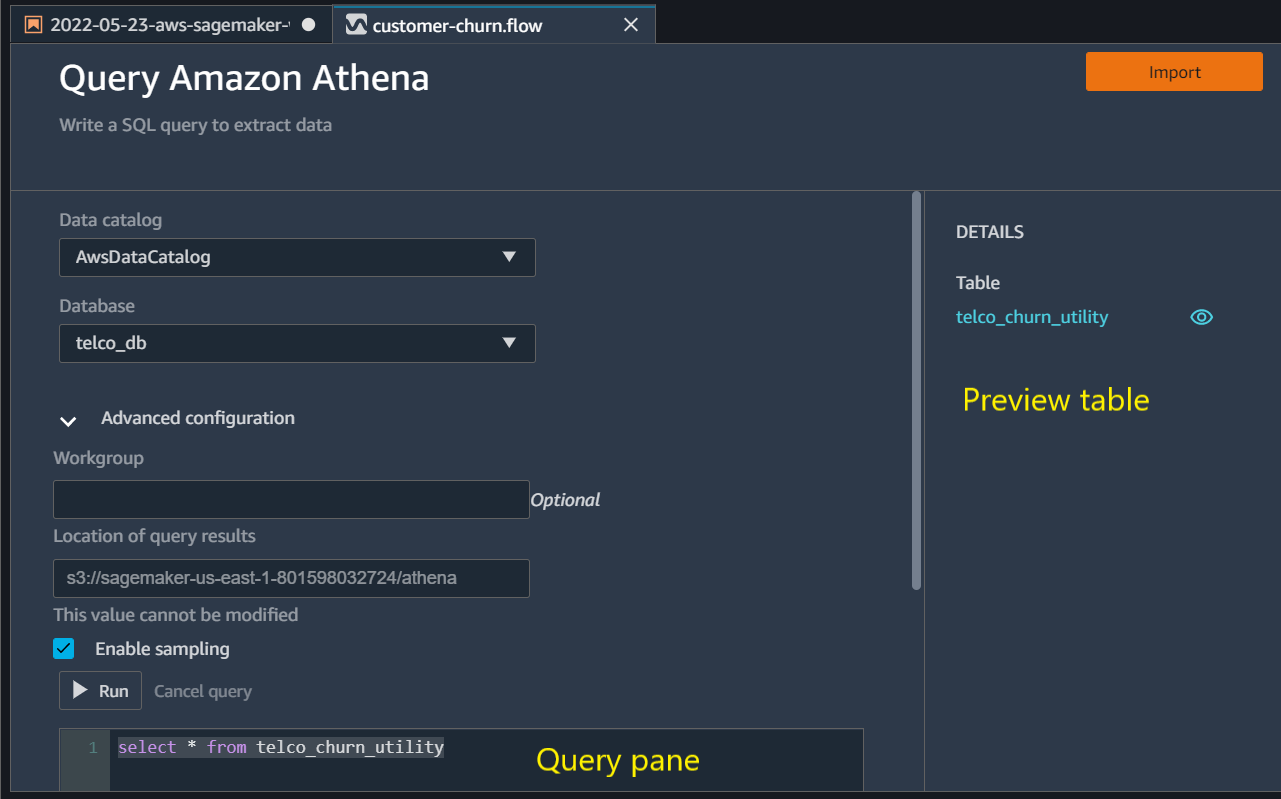
Now that we have imported data from S3, we can now work on importing data from the Athena database. For this from the Flow UI Import tab click on Amazon Athena option. From the next UI select AwsDataCatalog Data catalog option. For Databases drop down select telco_db and in the query pane write the below query.
select * from telco_churn_utilityYou can also preview the data by clicking on the table preview option. Once satisfied with the results click ‘Import’. When asked about the database name write telco_churn_utility
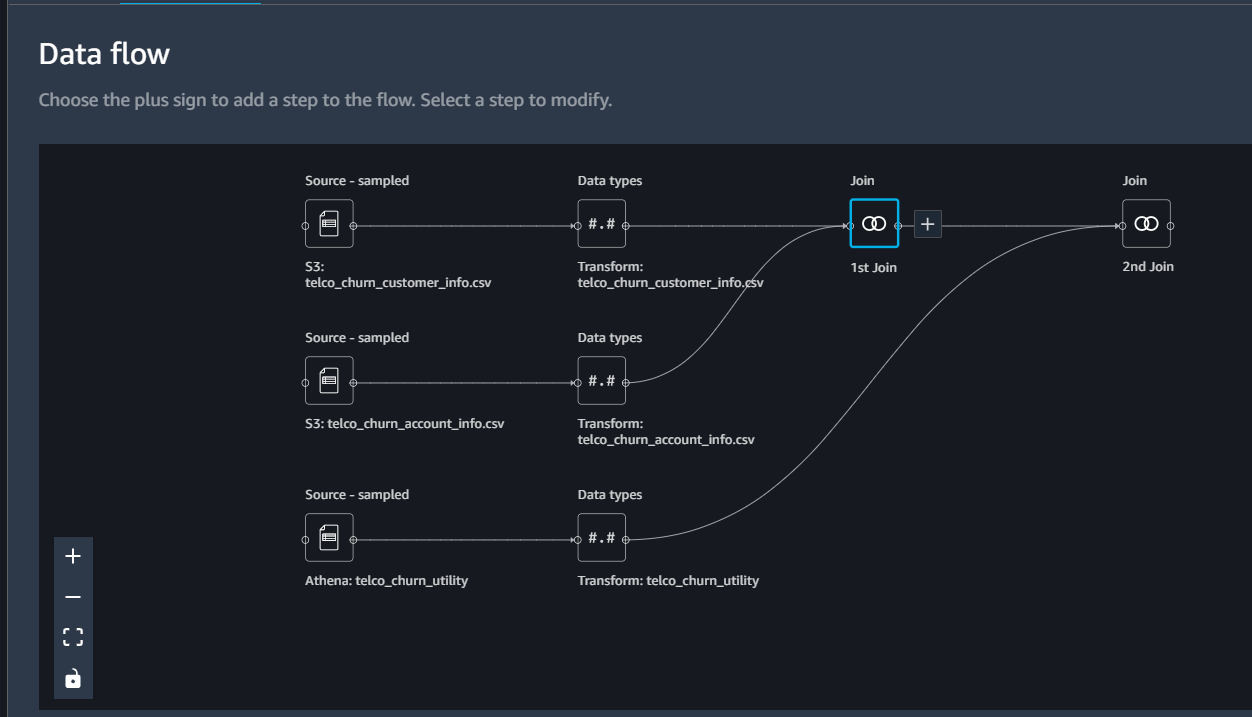
At this point, you will find all three tables imported in Data Flow UI. Against each table, a plus sign (+) will appear that you can use to add any transformations you want to apply on each table.
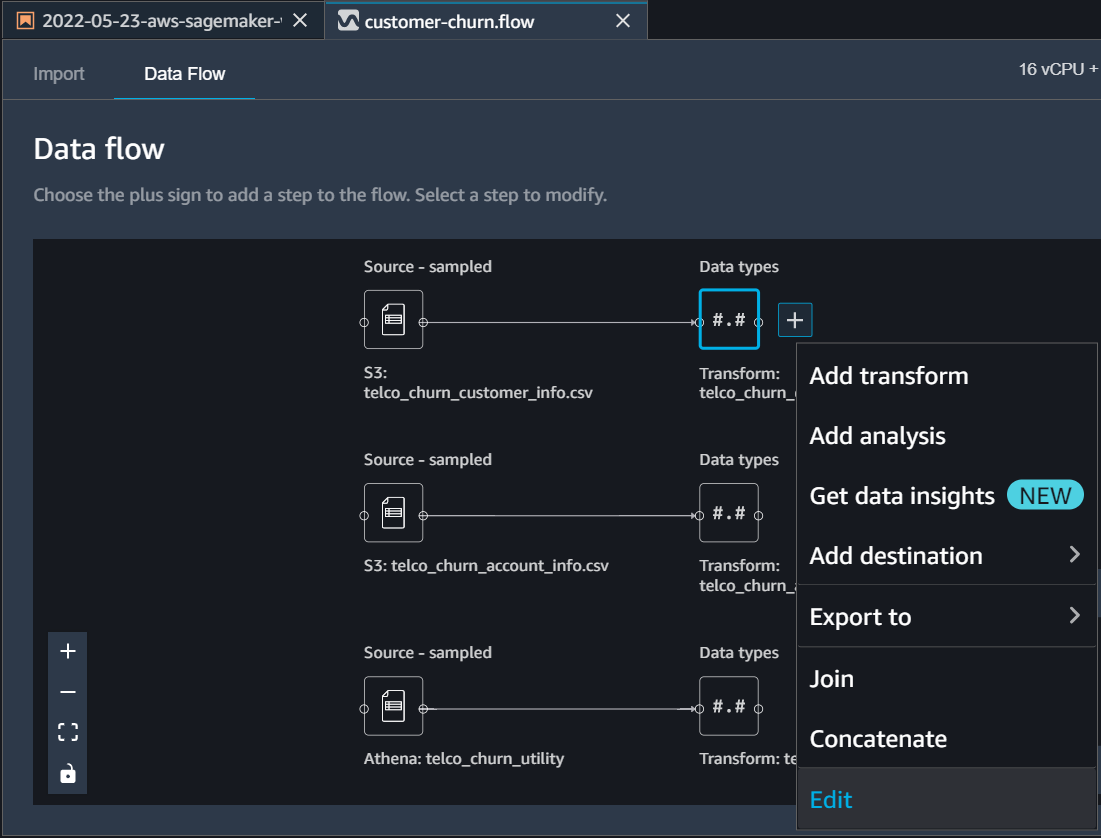
for telco_churn_customer_info click on the plus sign and then select ‘Edit’ to change data types.
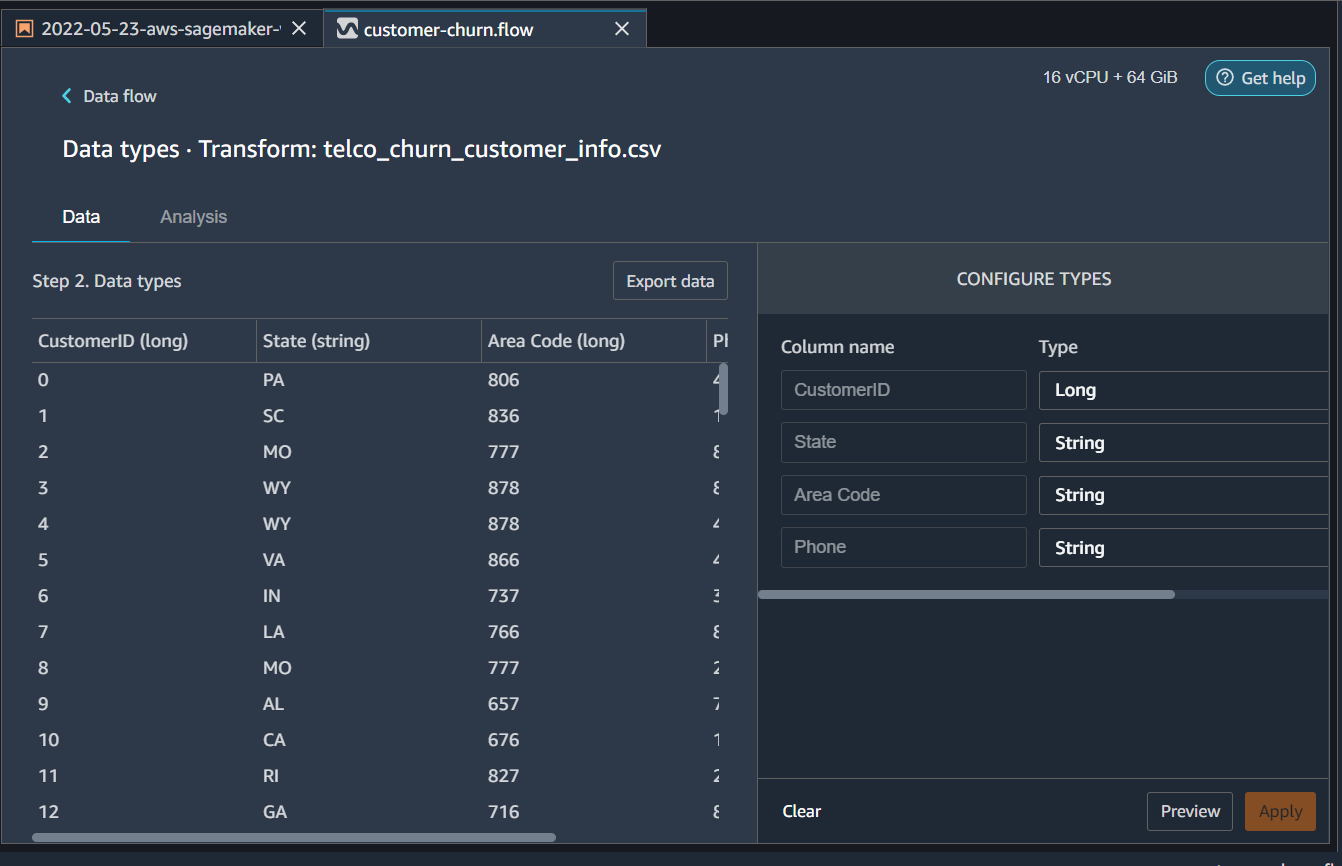
We will add the following transformations * Change Area Code from Long to String * Click Preview * Then click Apply
Similarly for telco_churn_account_info.csv edit data types as * Change Account Length to Long * Change Int’l Plan and VMail Plan to Bool * Click Preview and then click Apply
For telco_churn_utility.csv edit data types as * Change custserv_calls to Long * Click Preview and then click Apply
At this point, we have imported the data from all three sources and have also properly transformed their column types.
Joining Tables
Now we will join all three tables to get a full dataset. For this from the Flow UI Data flow click on the plus sign next to customer_info data type and this time select ‘Join’. From the new window select account_info as the right dataset and click Configure
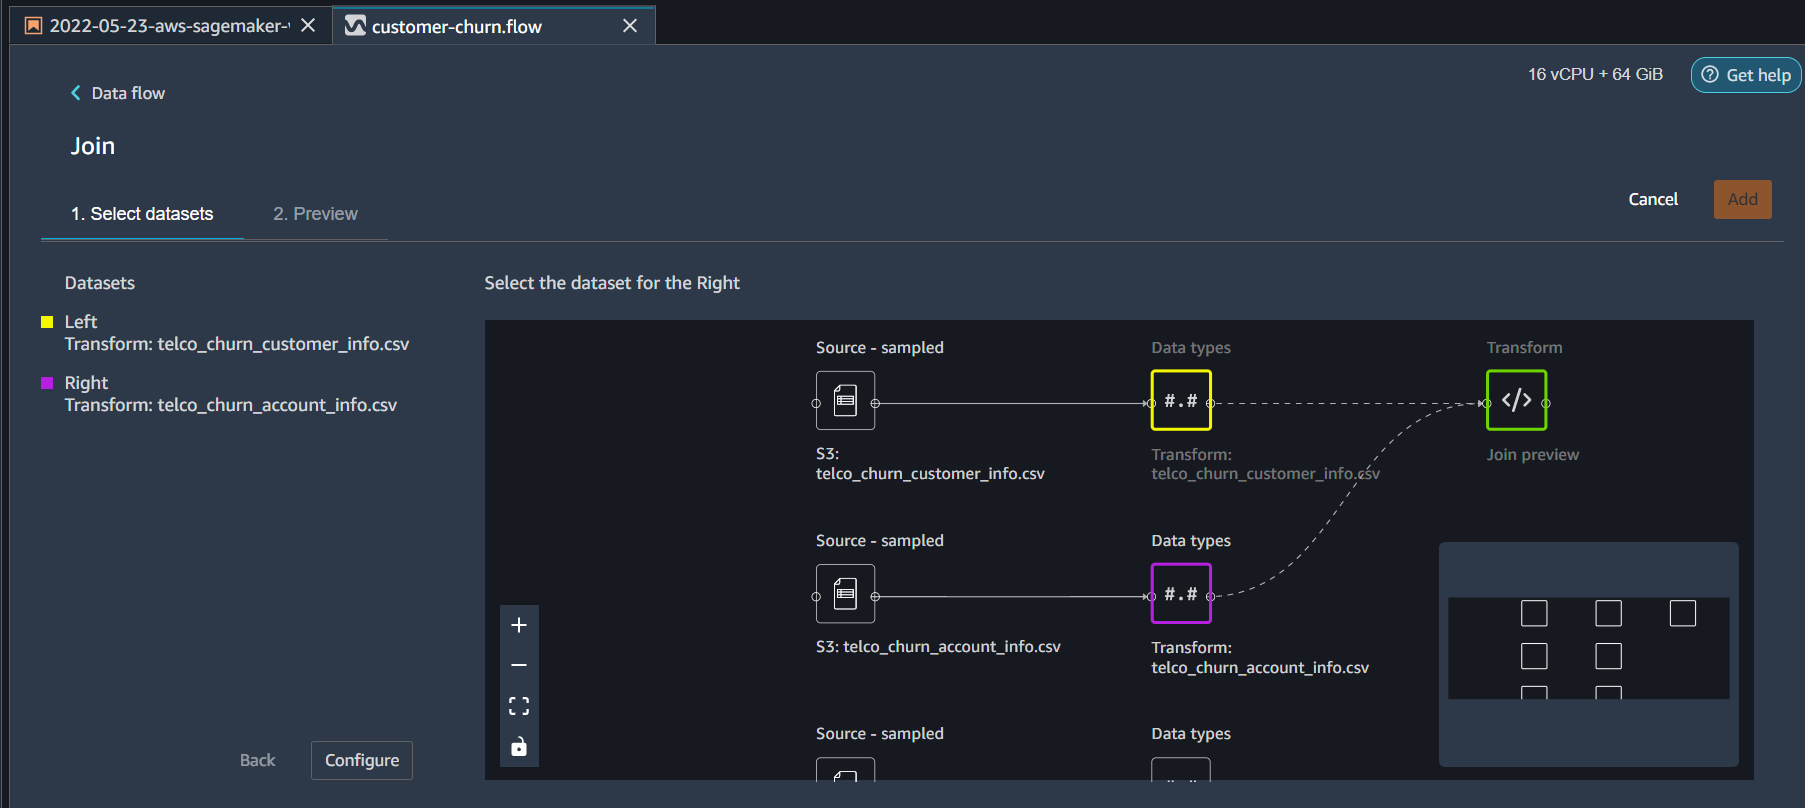
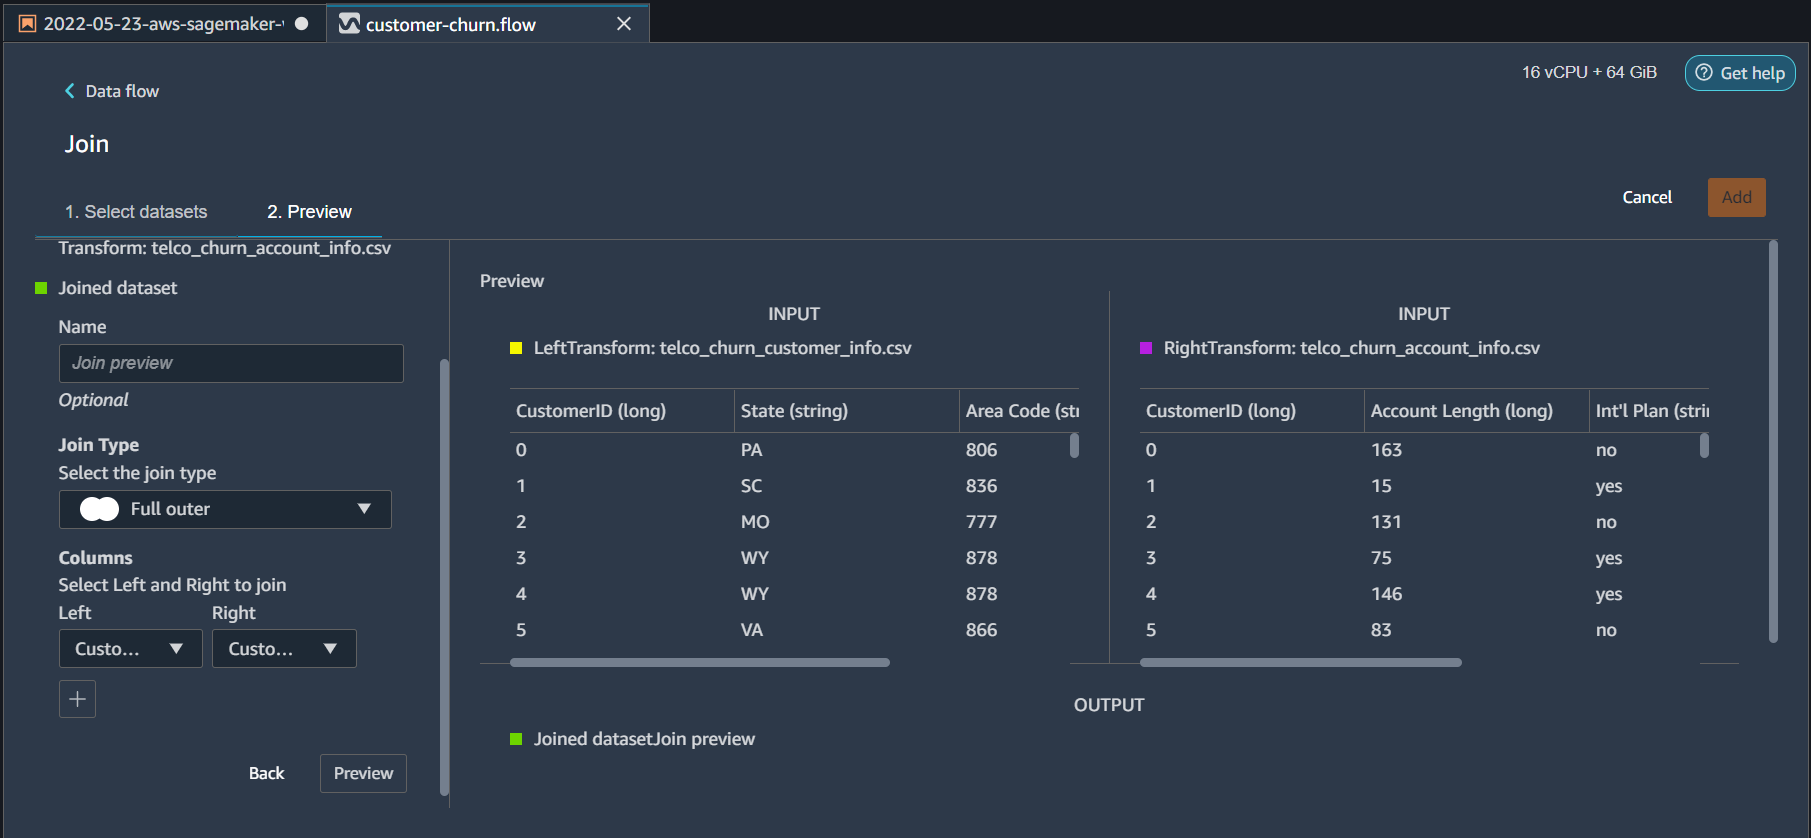
From the next screen select * Join Type = Full Outer * Columns Left = CustomerID * Columns Right = CustomerID * Click Preview and then Add
A new join step will appear on the Data Flow UI. Click on the plus sign next to it and repeat the steps for utility table
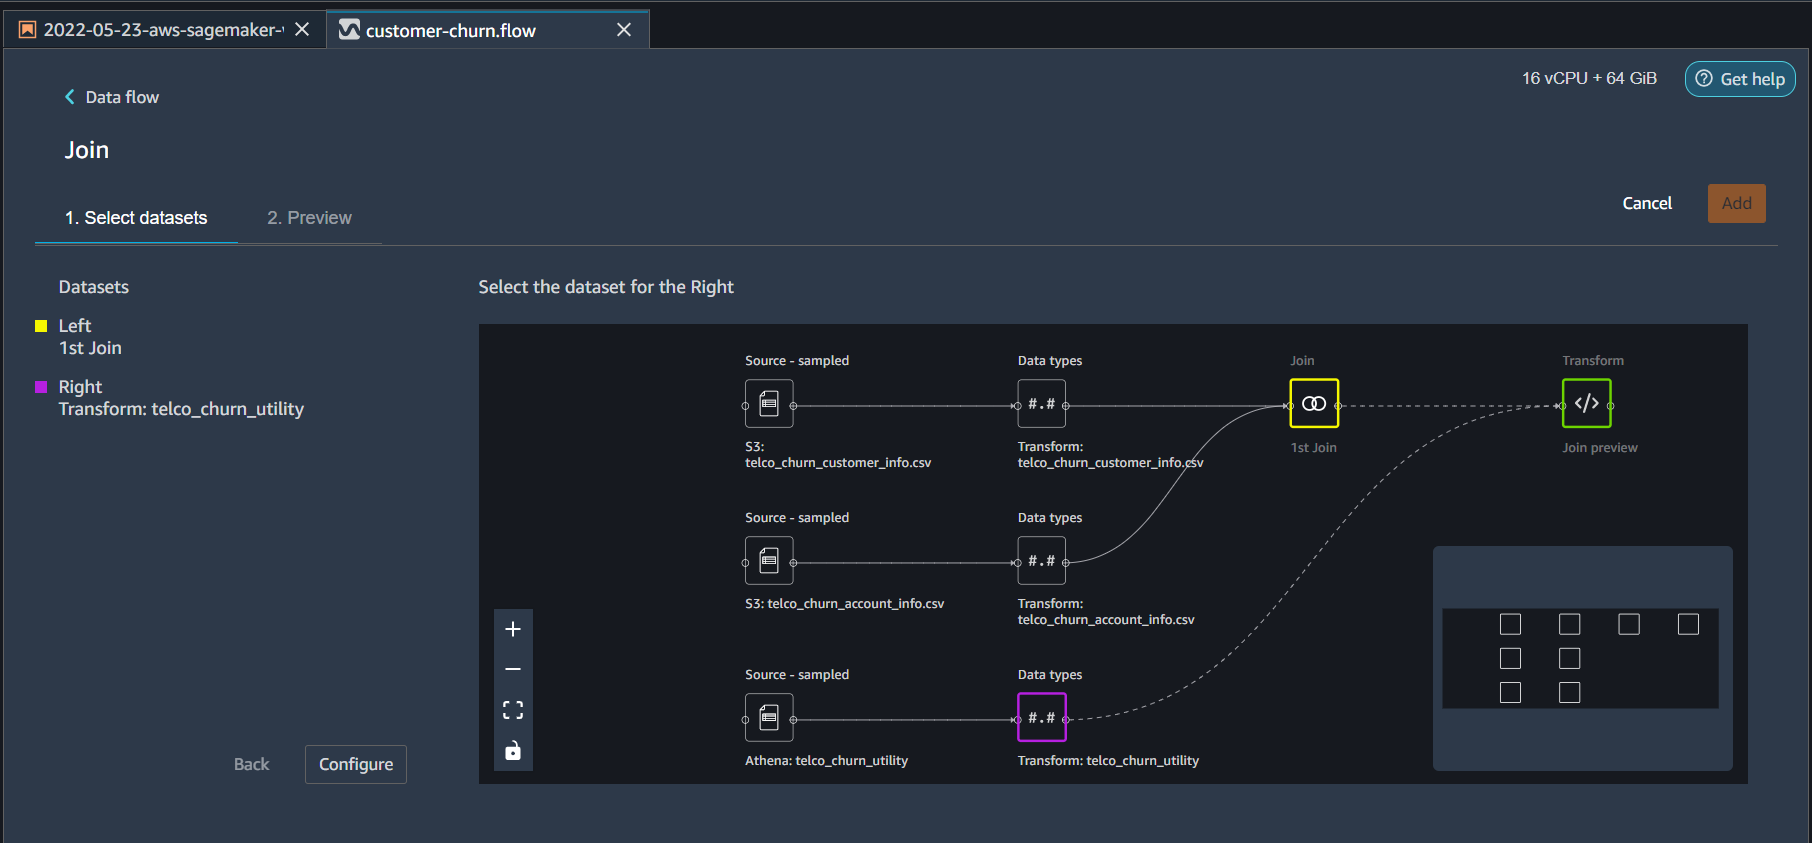
- Join Type = Full Outer
- Columns Left = CustomerID_0
- Columns Right = CustomerID
- Click Preview and then Add
Summary
At this point, we have all the tables joined together. The customer-churn.flow created is available on the GitHub here. In the next post, we will clean duplicate columns and create some visualizations to analyze the data.