Docker - Debugging Python Application
docker, python, wsl2, windows 10, debug, remote container, vscode

About
This post is about debugging a Python application running on a Docker container inside WSL2 linux environment. Highlight of this post is Visual Studio Code environment and it extensions Remote Containers.
Environment Details
- Python = 3.8.x
- WSL version = 2
- WSL Ubuntu version = 20.04
- Docker Engine version = 20.10.12
- Docker Desktop version = 4.4.4
- Host OS = Windows 10
- VSCode version = 1.65
Sample Application
For this post I will use a a simple hello world application that will print “hello world” messages to stdout, and also logs them in a logfilelog. After each message the application sleeps for 5 seconds, and keeps on doing this for 5 mins (300 sec). After this the program exists.
This application was created as part of the previous blog post Docker - Accessing Python Application Logs. It is a very simple application, and you can find all the code in GitHub repository snapshots-docker-post-11032022 * Project code files * Project zip file
Project structure of this application is
app/
├── src/
│   ├── commons/
│   │   └── logger.py
│   └── hello.py
└── Dockerfile
Where * app/ is the project root folder * src/ folder contain the python application code * src/commons/logger.py is the logging module * src/hello.py is the main application * app/Dockerfile is the Docker image build file
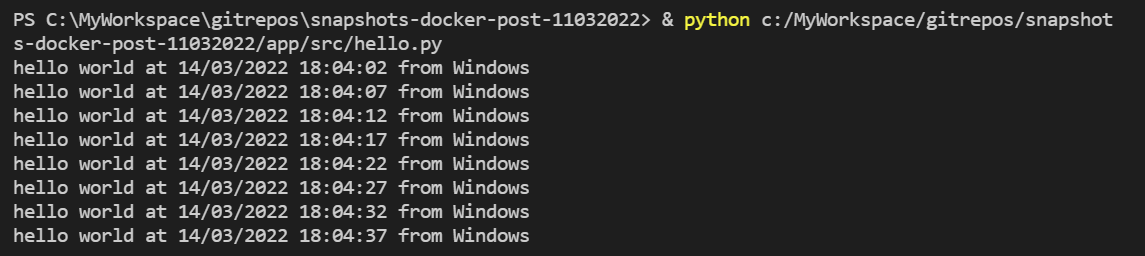
When I run the src/hello.py file from my local machine (Windows 10) I get the output on the termial with hello world messages like this.
A “logfile.log” will also appear in the project directory containing the logged messages.
.
├── app/
│   ├── src/
│   │   ├── commons/
│   │   │   └── logger.py
│   │   └── hello.py
│   └── Dockerfile
└── **logfile.log**
Contents of “logfile.log” file will look like this
INFO 2022-03-11 13:01:56,451 - hello world at 11/03/2022 13:01:56
INFO 2022-03-11 13:02:01,464 - hello world at 11/03/2022 13:02:01
INFO 2022-03-11 13:02:06,466 - hello world at 11/03/2022 13:02:06
INFO 2022-03-11 13:02:11,480 - hello world at 11/03/2022 13:02:11
INFO 2022-03-11 13:02:16,496 - hello world at 11/03/2022 13:02:16
We can build our docker image and run it using commands
docker build --tag python-docker .
docker run --name helloworld python-docker
Output on the terminal will be like this 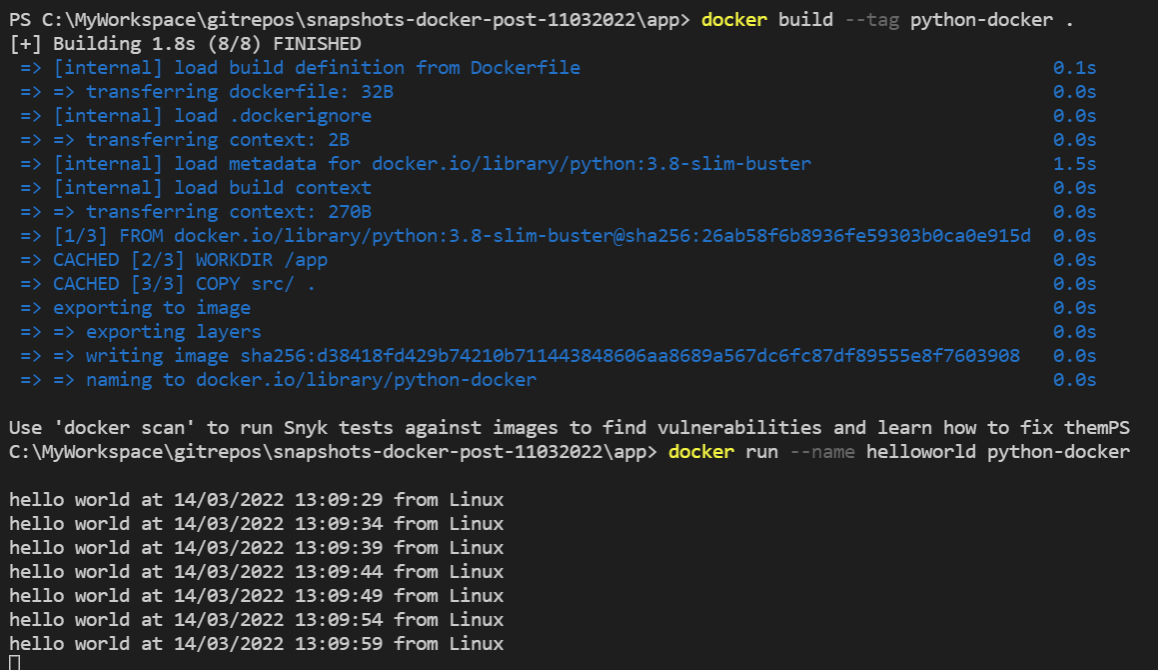
Notice the difference in the print message when the application was is locally, and from the docker container. * Local (Win10) message = hello world at 14/03/2022 18:04:02 from Windows * Docker container message = hello world at 14/03/2022 13:12:14 from Linux
Debug Docker Application
To debug the application from inside the docker container we will use VSCode extention Visual Studio Code Remote - Containers. From the extension docs > The Visual Studio Code Remote - Containers extension lets you use a Docker container as a full-featured development environment. It allows you to open any folder inside (or mounted into) a container and take advantage of Visual Studio Code’s full feature set.
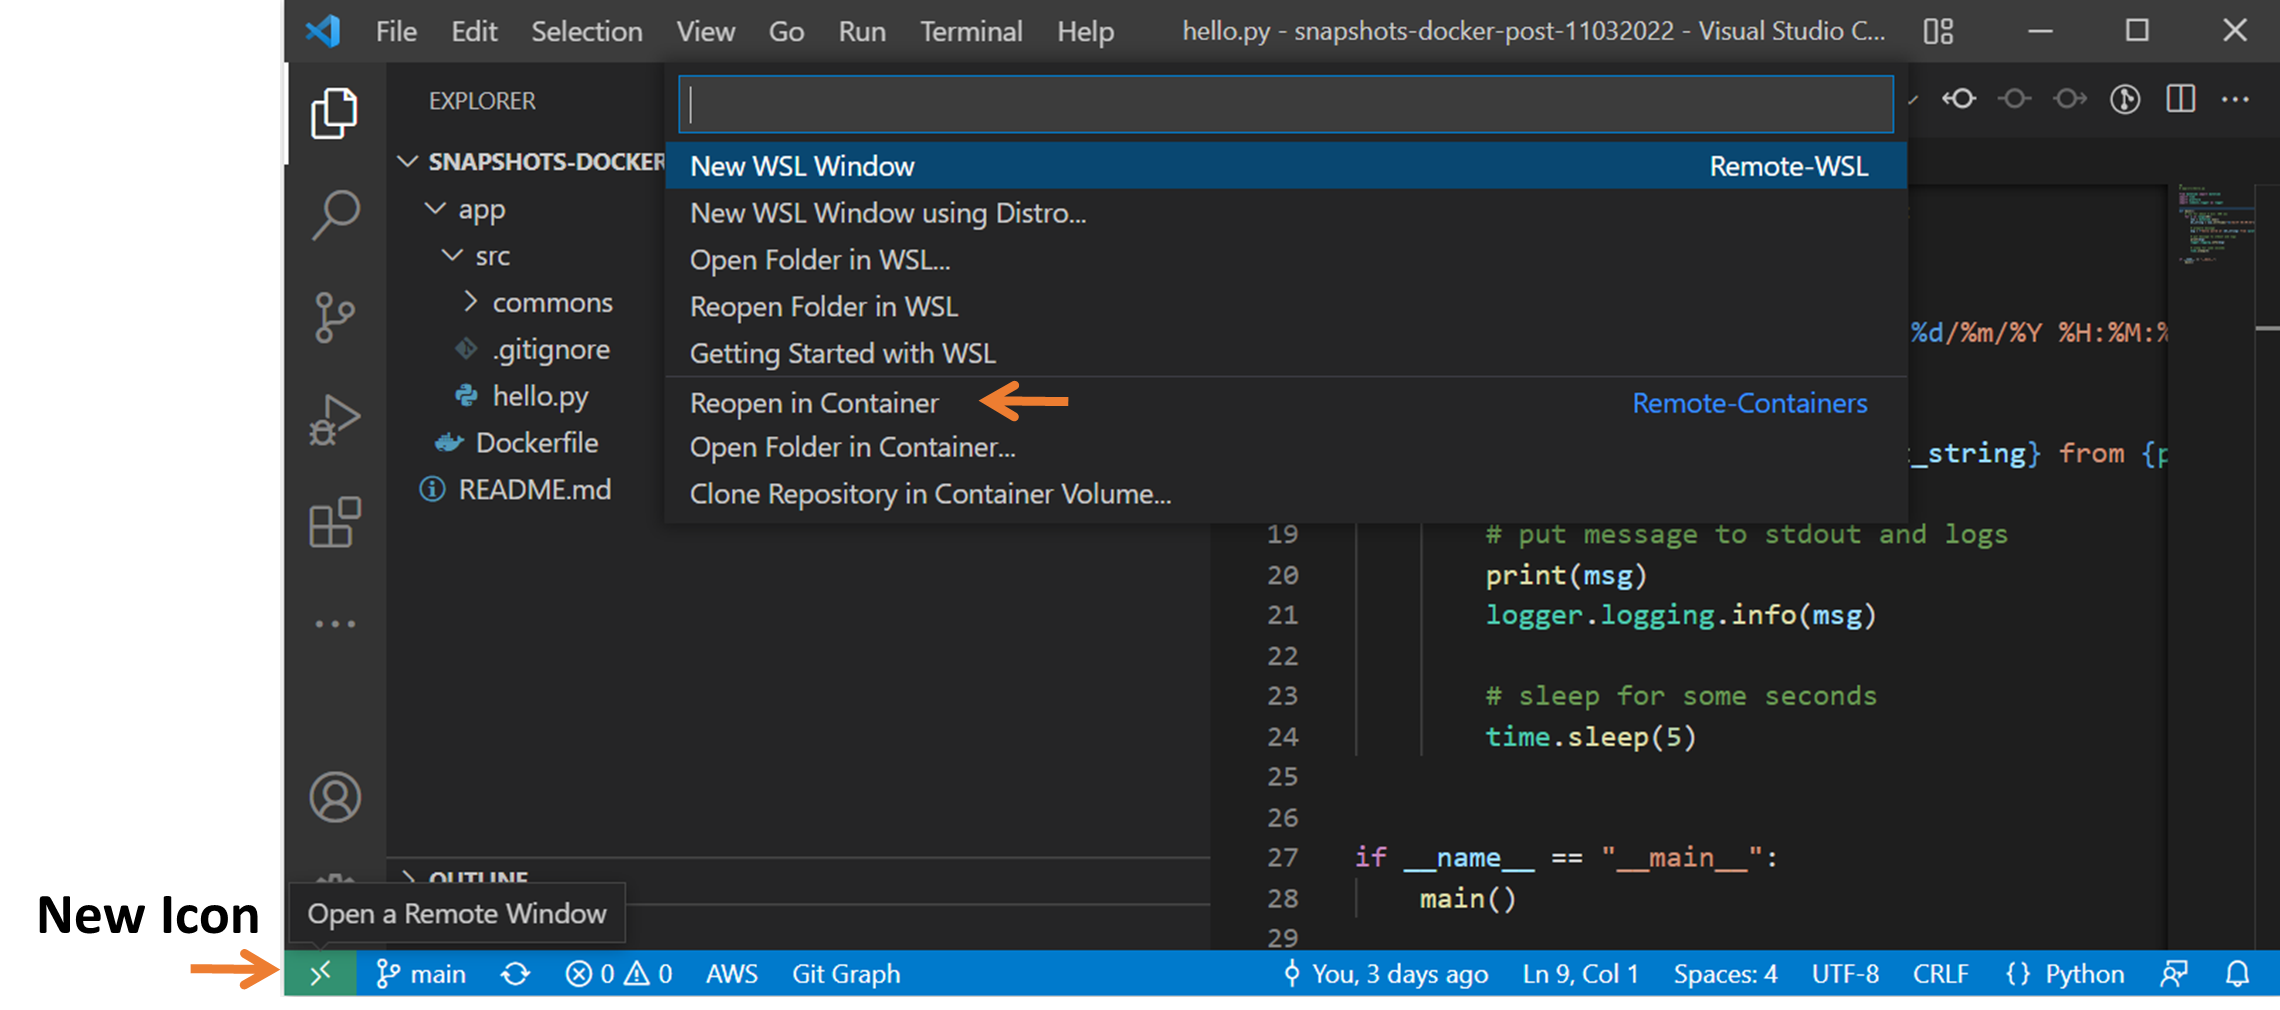
Once this extension is installed a new icon ( Remote Window ) will appear at the bottom left corner of the VSCode window. Once clicked on the icon, a dropped down will appear as shown below. From this drop down choose option Reopen in Container
Now it is important to understand that Visual Studio Code Remote - Containers extension let’s you use a Docker container as a full-featured development environment. It allows you to open any folder or repository inside a container and take advantage of Visual Studio Code’s full feature set including code debugging, linting, formatting, intellisense, and other tooling. VSCode also provides its own prebuild docker images with all the necessary tools installed into them. Or we can we instruct the VSCode to create a new development container using our docker file. You can find a list of prebuild docker images here: microsoft-vscode-devcontainers
VSCode uses a configuration file called “devcontainer.json” to store instructions on how to create and attach to a development container. You can read more about this config file here: devcontainerjson-reference
Now let’s create a new docker development environment using our Dockerfile. * Open VSCode Commands Palette (F1 or CTL+Shift+P on Win10) * Select “Remote-Containers: Add Development Container Configuration Files” option from dropdown * Then select “from Docker” since we want our development container environment same as defined in the Dockerfile
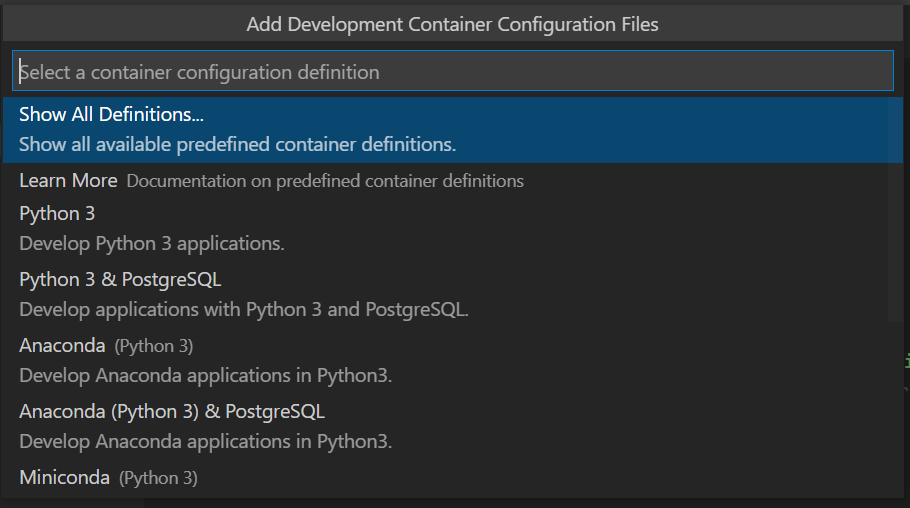
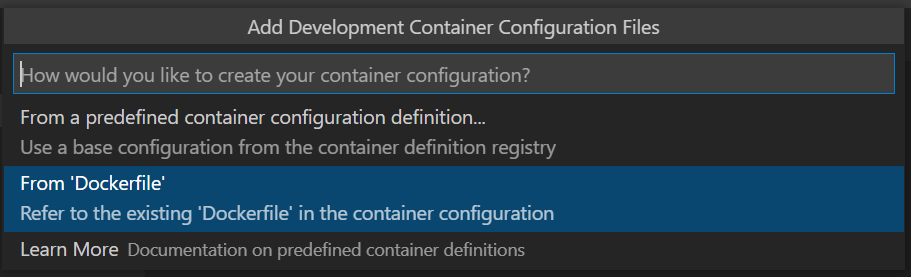
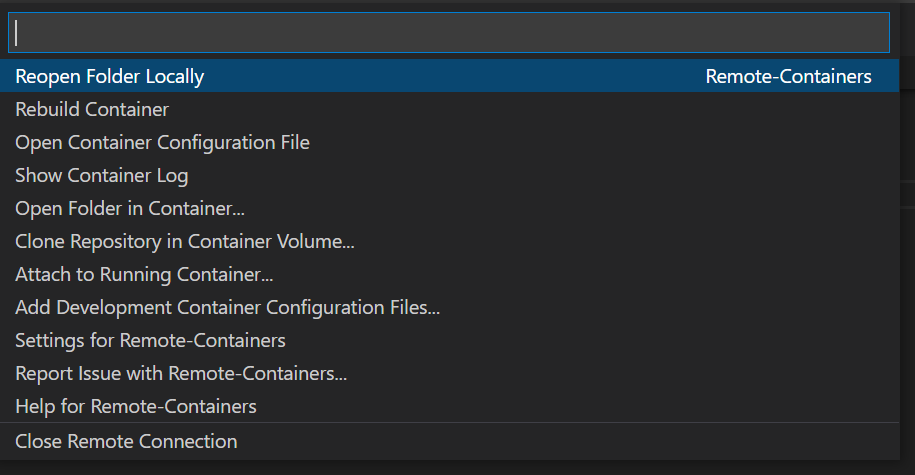
If this option is not available, and the drop down is showing other options like in the image below, then VSCode is unable to find a Dockerfile associated with the project.
Notice my project dir in the image below. The root folder of my project snapshots-docker-post-11032022 does not contain any Dockerfile.
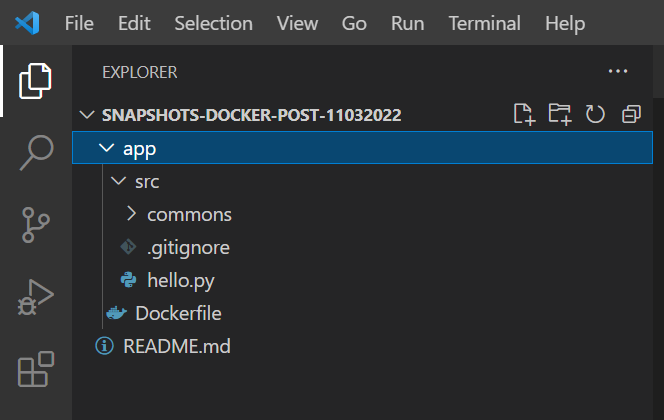
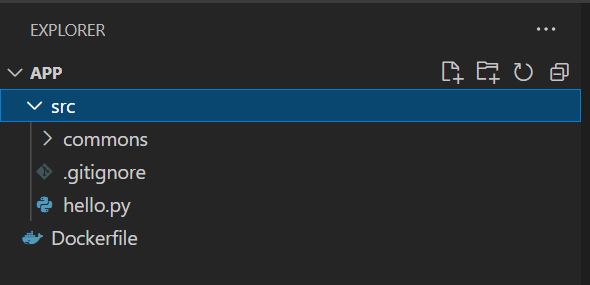
VSCode remote extension assumes that there is a Docker file at the root of the project directory. My project root contain app/ folder and inside this folder Dockerfile is located. When we select “Remote-Containers: Add Development Container Configuration Files” option docker extension checks the project root folder for a Dockerfile. It could not find one in my project and that is why it removed ‘From Dockerfile’ option from the dropdown. Let’s correctly open the project with app/ as the root folder (or place the Dockerfile at the project root folder). After correcting this mistake, my project in VSCode looks like this
Now use the extension one more time to create a development container. This time you will find the option “From Dockerfile” in the dropdown menu
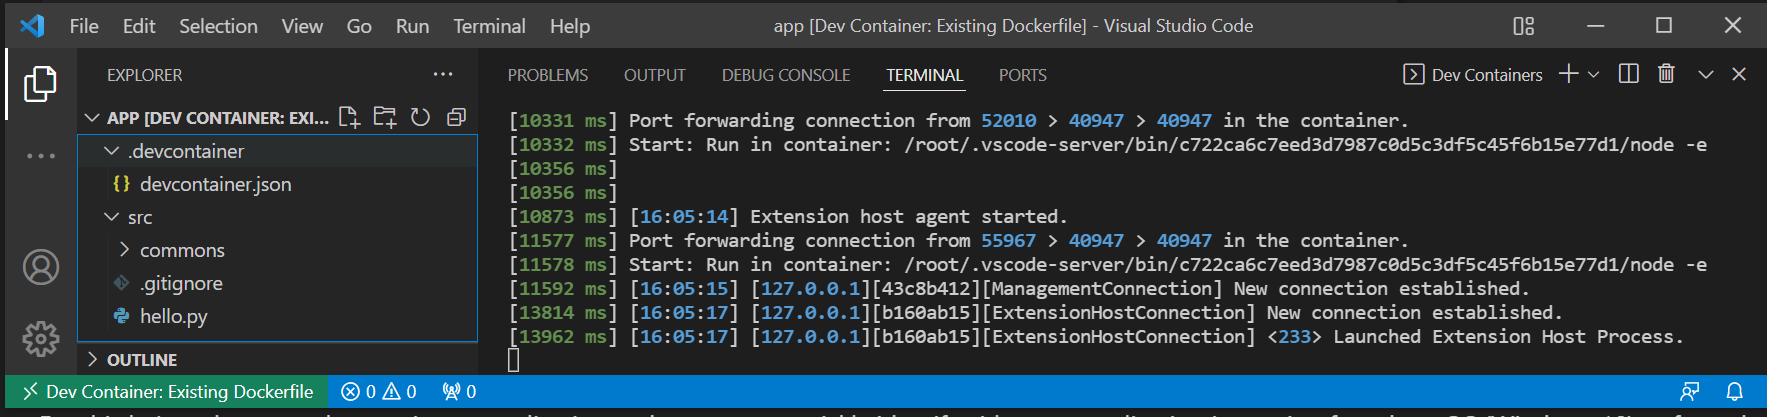
Once this option is selected, VSCode will add a folder “.devcontainer” in the project root containing instructions on how to build and launch the development container. Then it will run those instruction to launch a container and connect to it. VSCode terminal will show the logs of all the commands used in launching that container, and at bottom left of VSCode window it will show the name of the container to which it is currently connected.
Note that at this point we are actually working from inside a container. But to actually develop and debug the code from this container you will be required to install more extensions to it. If we had used a VSCode prebuild image then all the required extensions will be automatically available. To install required extension we can use VSCode extensions tab.
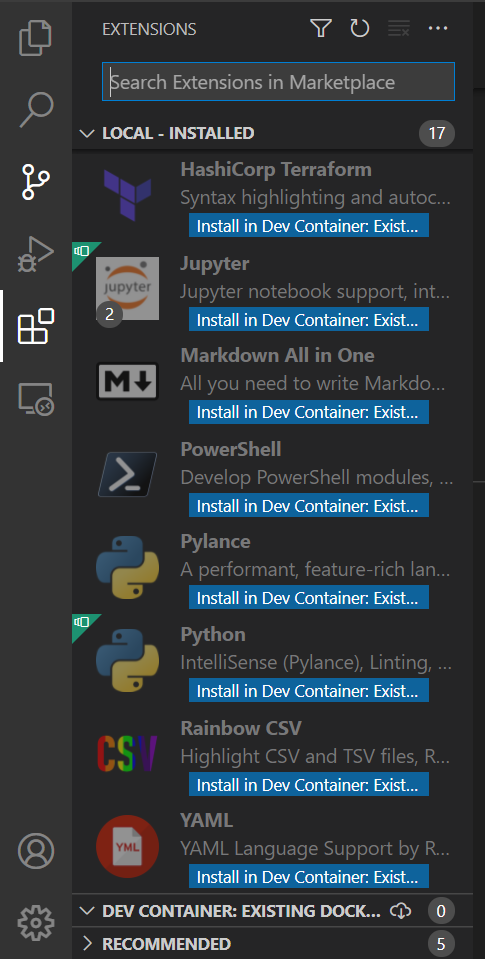
Python extension will be required to work with Python code. So let’s intall in our working container. You can also copy the names of installed extensions and paste them in the “.devcontainer” config file as shown below
// Add the IDs of extensions you want installed when the container is created.
    "extensions": [
        "ms-python.python",
        "ms-python.vscode-pylance"
    ]
This way when next time we use this config file to launch a new dev container, all these extensions will be automatically installed for us. To customise the config file you can take help from this template provided by VSCode team python-3/.devcontainer
Installation of the extensions can be verified from the VSCode terminal logs

We can now run our Python code from inside this container

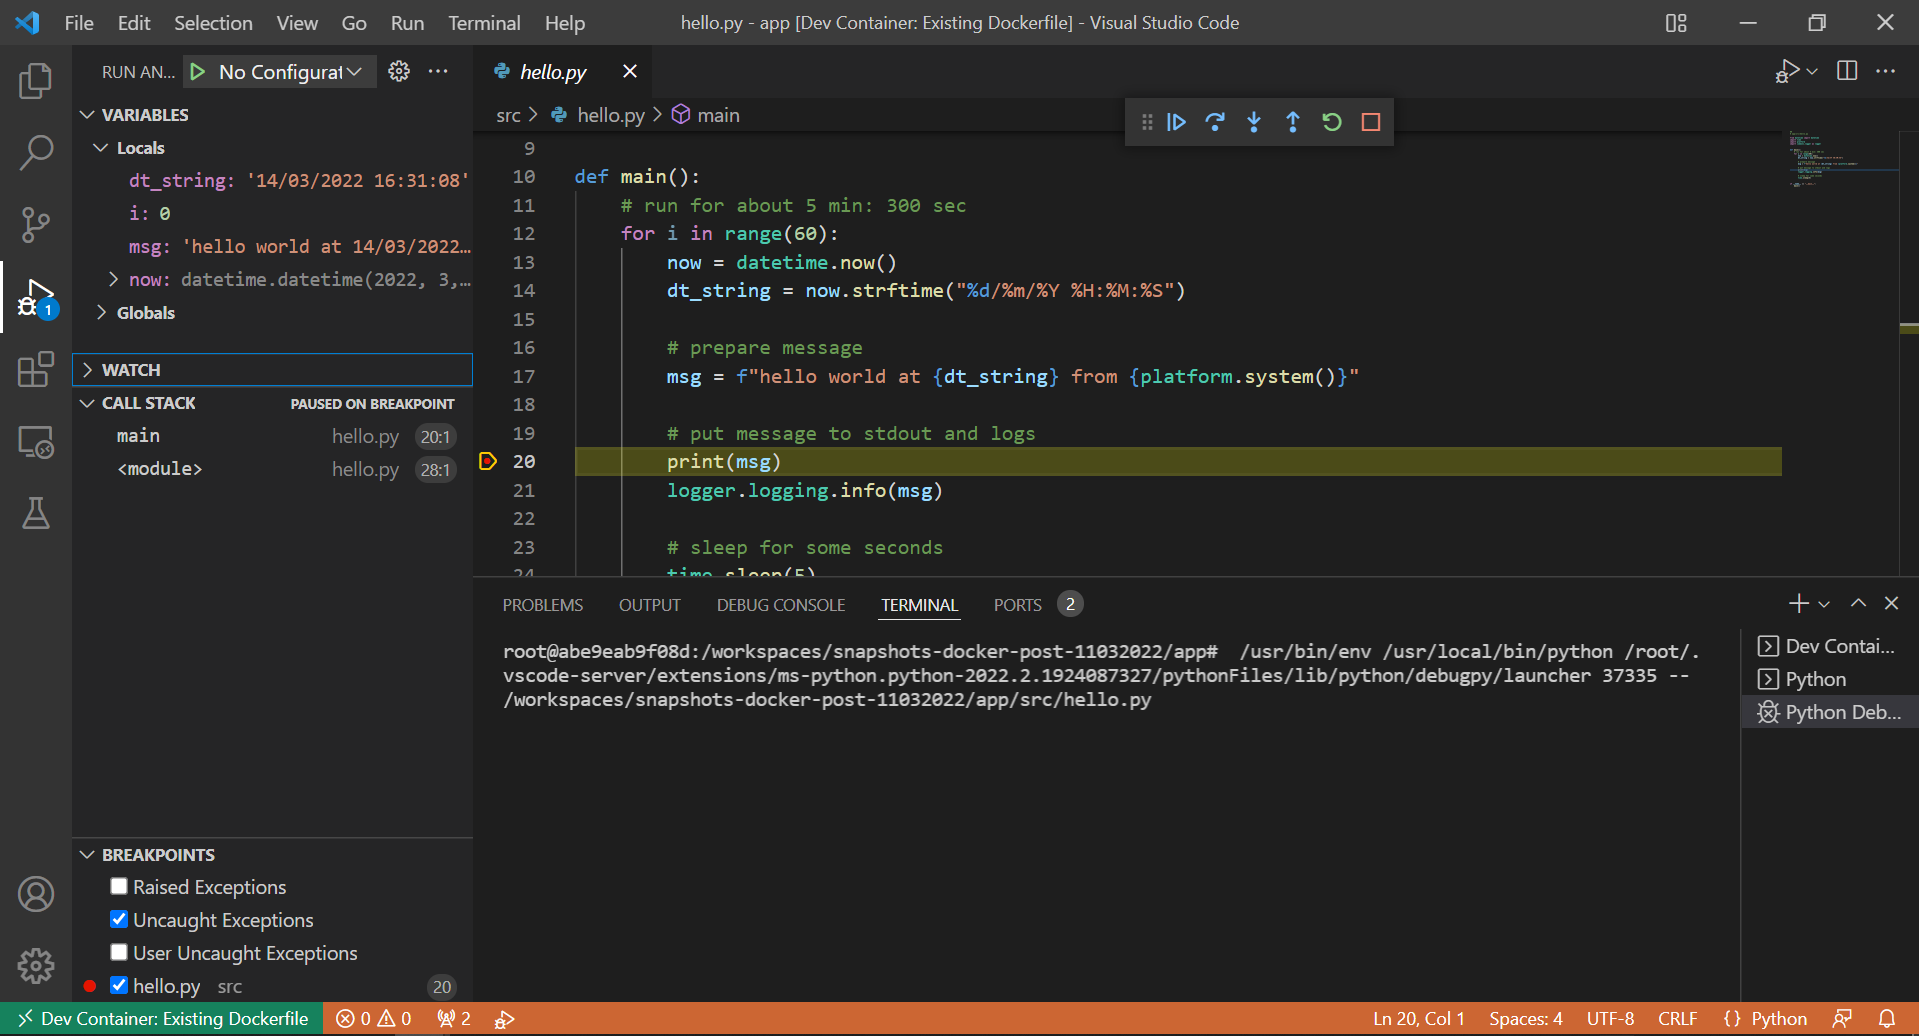
We can also easily debug our code directly from inside the container
To close the remote connection, click on the Remote Window Icon at the bottom left corner. Use “Reopen Folder Locally” option to return back to local environment. Or “Close Remote Connection” to close the remote connection and also close the project.
All the code used for this post can be obtained from the GitHub repository hassaanbinaslam/snapshots-docker-post-11032022